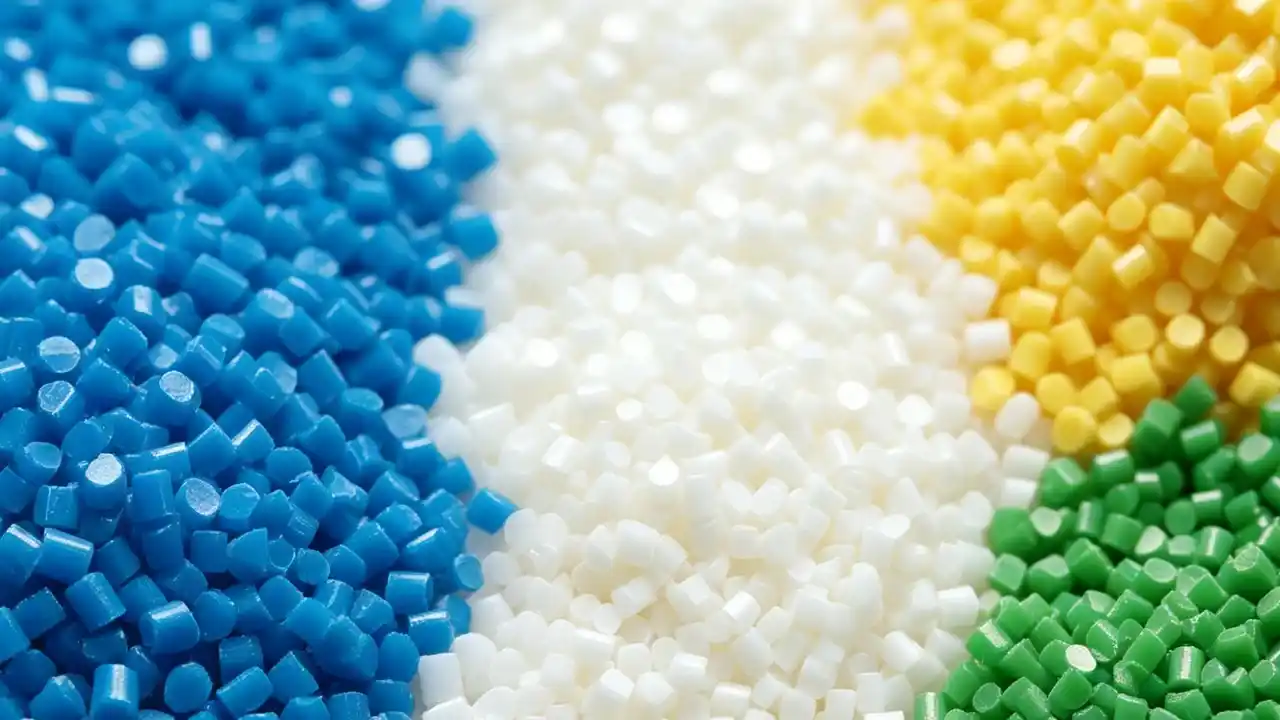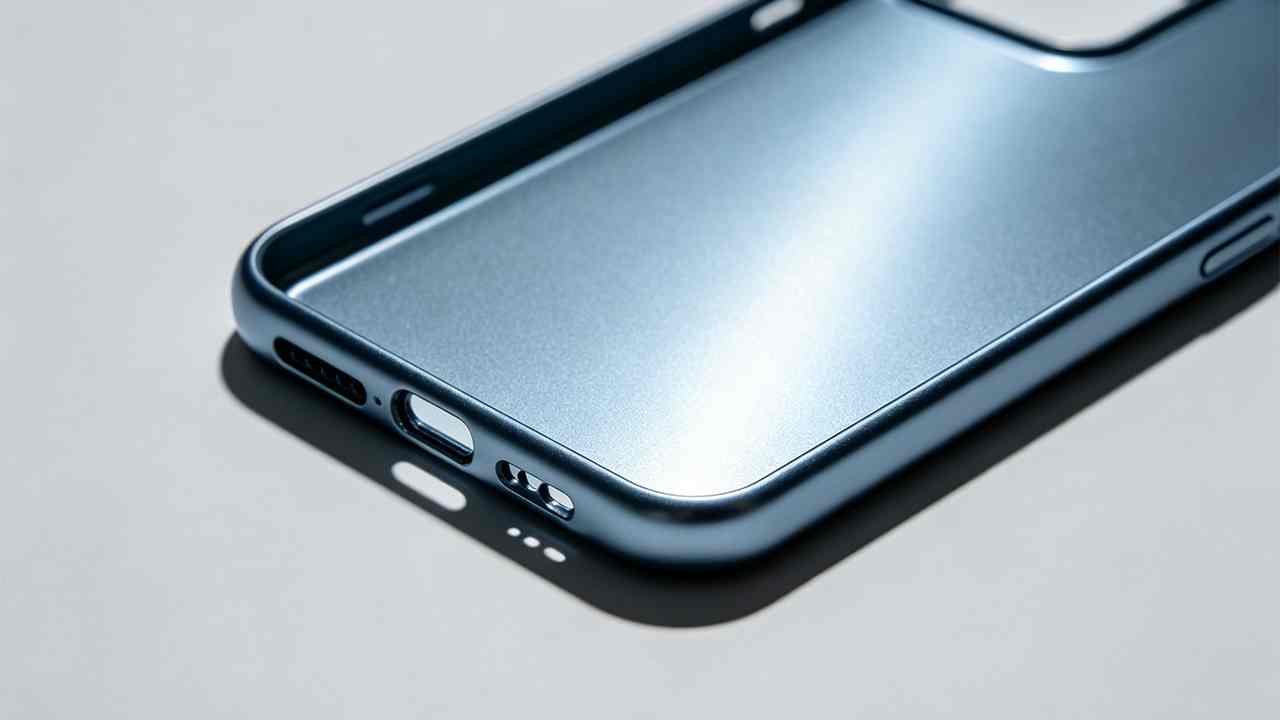
Nehmen Sie doch einfach mal ein beliebiges Kunststoffprodukt in Ihrer Nähe in die Hand – eine Handyhülle, eine Fernbedienung oder den Verschluss einer Wasserflasche. Ist Ihnen aufgefallen, wie glatt sich manche dieser Oberflächen anfühlen? Das ist kein Zufall. Hinter jedem seidig glatten, hochwertigen Kunststoffteil steckt eine sorgfältig vorbereitete Form, und der letzte Schritt, der den entscheidenden Unterschied ausmacht, ist etwas, worüber die meisten Menschen außerhalb der Branche selten nachdenken: das Polieren.
Beim Polieren von Spritzgussformen wird die Oberfläche des Formhohlraums mithilfe von immer feiner werdenden Schleifmitteln, Poliersteinen und Diamantpasten geglättet und veredelt. Dabei werden Bearbeitungsspuren, Mikrokratzer und Oberflächenunregelmäßigkeiten vom Formstahl entfernt. Der Poliergrad – von grob bis spiegelglatt – bestimmt direkt, ob Ihr fertiges Kunststoffteil rau, matt, seidenmatt oder optisch klar aussieht. Im Präzisionsspritzguss ist die Qualität der Polierarbeiten ebenso entscheidend wie die Formkonstruktion selbst.
Aber die Sache ist die: Viele Produktingenieure und Entwickler betrachten die Oberflächenbearbeitung als Nebensache. Sie legen die Geometrie, die Entformungsschrägen und die Angussgestaltung genau fest – und winken dann bei den Vorgaben zur Oberflächenbeschaffenheit in der Zeichnung quasi ab. Das ist ein kostspieliger Fehler. Lassen Sie mich erklären, warum – und Ihnen genau zeigen, was nötig ist, um es richtig zu machen.
Warum sollten wir eine Formpolitur durchführen?
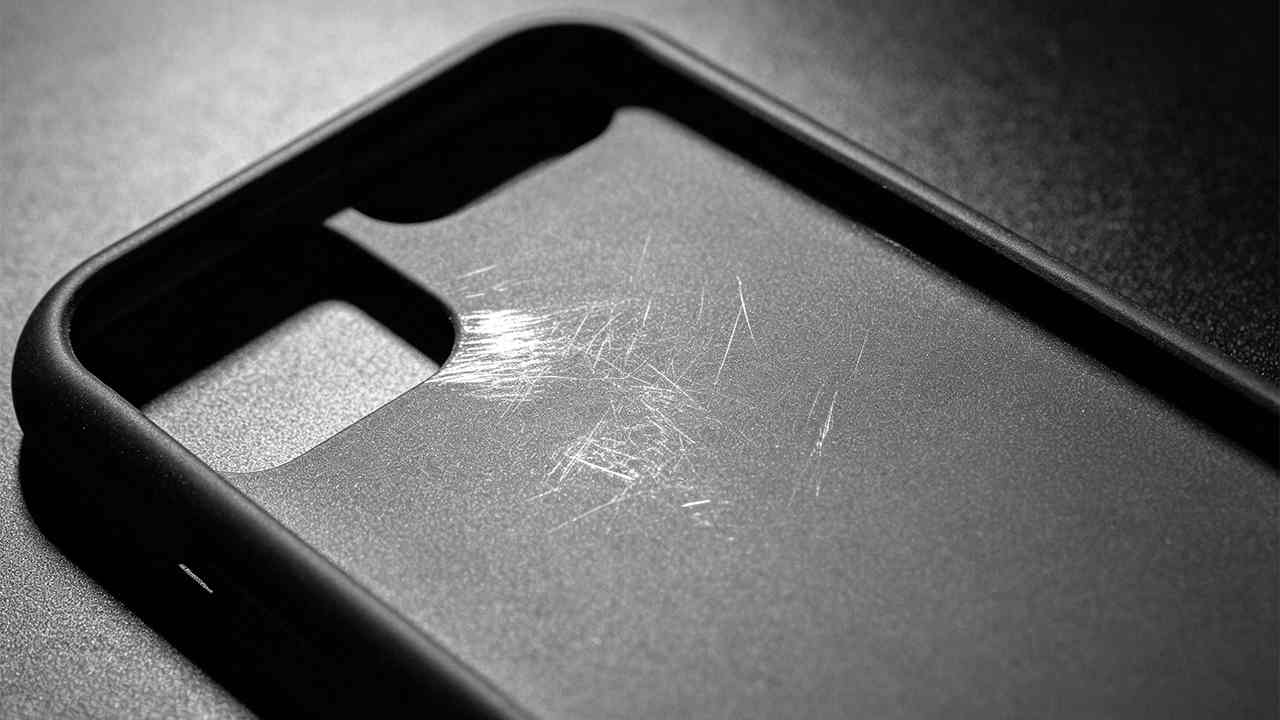
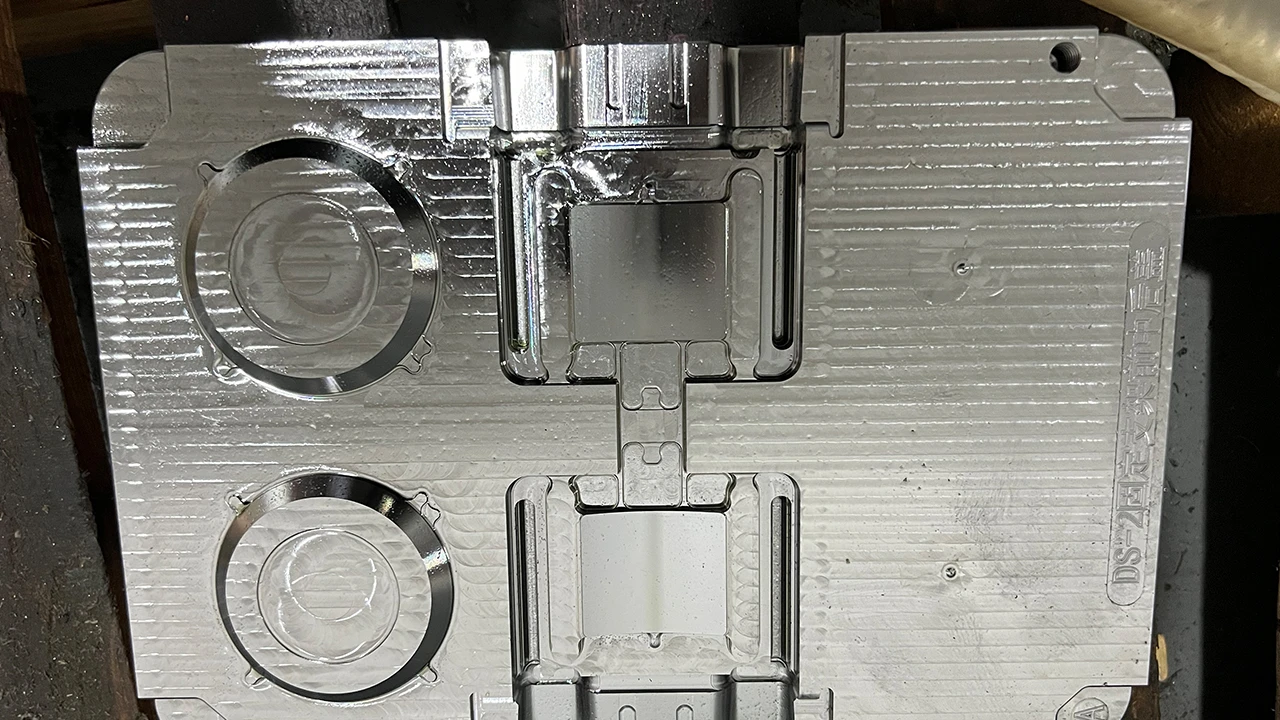
Ist die Oberfläche der Form rau, wird auch das Kunststoffteil rau sein. Der Formhohlraum ist im Grunde genommen eine “Negativform” – jeder Kratzer, jede Werkzeugspur, jede Mikrorille auf dem Stahl wird originalgetreu auf die Oberfläche jedes einzelnen Teils übertragen, das damit hergestellt wird. Über Zehntausende von Zyklen hinweg summiert sich das schnell. Die Gründe für eine ordnungsgemäße Politur gehen jedoch weit über das reine Aussehen hinaus.
Das Polieren von Formen ist aus mehreren miteinander verbundenen Gründen notwendig: Es gewährleistet einen reibungslosen Auswurf der Teile, indem es die Reibung zwischen dem ausgehärteten Kunststoff und dem Formstahl verringert, verhindert, dass Teile beim Entformen kleben bleiben oder einreißen, verkürzt die Spritzzykluszeit, erhöht die Korrosionsbeständigkeit der Formoberfläche und bestimmt direkt die optische Qualität des fertigen Kunststoffteils. Das Weglassen oder eine unzureichende Durchführung der Politur führt zu Oberflächenfehlern, höheren Ausschussquoten, längeren Zykluszeiten und beschleunigtem Formverschleiß – all dies führt direkt zu unnötigen Kosten.
Es geht um mehr als nur das Aussehen
Hier ist eine Analogie, die ich hilfreich finde. Stell dir vor, du backst einen Kuchen in einer Form, die zerkratzt und nie eingebrannt wurde. Der Kuchen bleibt kleben, du hast Mühe, ihn herauszubekommen, und die Hälfte davon kommt in Stücken heraus. Nimm nun eine gut eingebrannte, glatte Form – derselbe Teig, ein völlig anderes Ergebnis.
Das ist im Wesentlichen die Funktion des Polierens beim Spritzgießen.
Ausstoßwirkungsgrad ist einer der am besten messbaren Vorteile. Wenn die Formkammer eine glattere Oberfläche aufweist, lässt sich das erstarrte Kunststoffteil sauber und gleichmäßig aus der Form lösen, wodurch die beim Auswerfen erforderliche Kraft reduziert wird. Bei dünnwandigen Teilen oder Bauteilen mit tiefen Strukturen geht es dabei nicht nur um das Aussehen – es geht darum, Risse, Verformungen und Verwindungen beim Entformen zu verhindern.
Verkürzung der Zykluszeit ist ein weiterer echter, greifbarer Vorteil. Eine glattere Formoberfläche bedeutet weniger Widerstand, wenn der geschmolzene Kunststoff durch den Formhohlraum fließt. Die Teile werden gleichmäßiger gefüllt, kühlen einheitlicher ab und lassen sich ohne Verzögerung auswerfen. Bei der Großserienfertigung – beispielsweise 500.000 Teile pro Jahr – hat bereits eine Zeitersparnis von ein oder zwei Sekunden pro Zyklus einen enormen kumulativen Wert.
Korrosionsbeständigkeit und Lebensdauer der Form stehen zudem in direktem Zusammenhang mit der Oberflächenqualität. Mikroverstiefungen und Oberflächenrauheit können Feuchtigkeit, Rückstände von Kunststoffadditiven und korrosive Ausgasungen einschließen – insbesondere bei der Verarbeitung von Materialien wie PVC oder flammgeschützten Typen. Eine gut polierte Oberfläche ist weniger anfällig für Verunreinigungen und lässt sich leichter reinigen, was die Lebensdauer des Werkzeugs erheblich verlängert.
Die funktionale Seite, die die meisten Menschen übersehen
Bei bestimmten Produktkategorien – optische Linsen, transparente Gehäuse, Komponenten für medizinische Geräte und besonders klare Konsumgüter – ist das Polieren keineswegs optional. Es ist eine zentrale technische Anforderung.
Eine polierte Formoberfläche ist die nur Der Weg zu einer Oberfläche mit nahezu optischer Klarheit, wie sie für Teile wie LED-Lichtabdeckungen, Kosmetikverpackungen oder Touchscreen-Linsen erforderlich ist. Keine noch so aufwendige Nachbearbeitung kann eine Formoberfläche vollständig ausgleichen, die von vornherein nicht gemäß den richtigen Spezifikationen poliert wurde.
Unter Der Formenentwicklungsprozess bei Dimud, Das Polieren der Formen wird als integraler Bestandteil des Werkzeugbaus betrachtet und nicht als bloßer Feinschliff – denn wir haben aus erster Hand erlebt, was passiert, wenn dieser Schritt unter Termindruck verkürzt wird. Auf Fotos mögen die Teile zwar akzeptabel aussehen, doch unter realen Lichtverhältnissen oder bei der Handhabung durch den Endverbraucher macht sich der Unterschied sofort bemerkbar.
Welche verschiedenen Methoden der Formpolierung gibt es?
Nicht jede Polierarbeit erfolgt auf dieselbe Weise, und nicht alle Formen erfordern denselben Ansatz. Die Wahl der falschen Methode kostet Zeit, birgt das Risiko einer Beschädigung des Stahls und kann dennoch dazu führen, dass Sie nicht die Oberflächenqualität erzielen, die Sie tatsächlich benötigen. Wenn Sie die wichtigsten Kategorien kennen, können Sie gezieltere Fragen stellen und fundiertere Entscheidungen treffen.
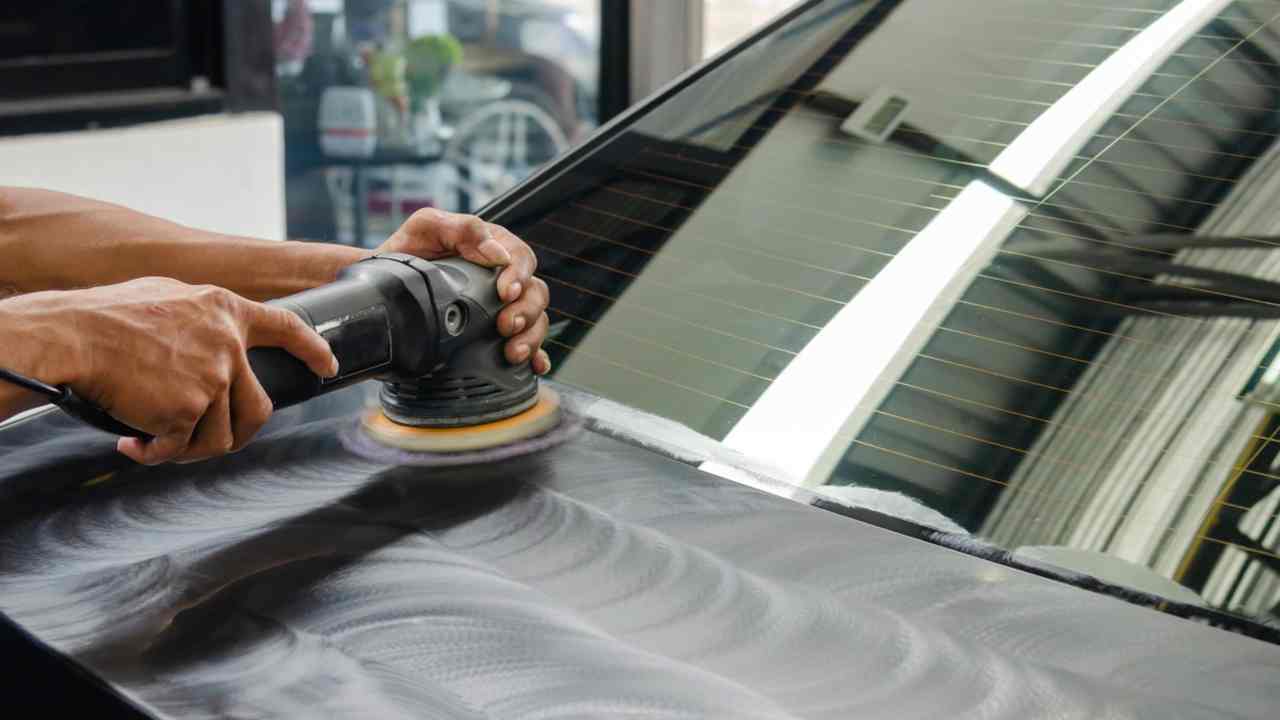
Die vier wichtigsten Verfahren zum Polieren von Formen sind: mechanisches Polieren (das am häufigsten verwendete Verfahren, bei dem Schleifmittel, Schleifsteine und handwerkliches Geschick zum Einsatz kommen), chemisches Polieren (bei dem chemische Lösungen verwendet werden, um Unebenheiten an der Oberfläche aufzulösen – besonders geeignet für komplexe Geometrien), Elektropolieren (ein elektrochemischer Prozess, bei dem Material selektiv abgetragen wird, um hochgleichmäßige Oberflächen zu erzielen) und Ultraschallpolieren (bei dem hochfrequente Schwingungen und Schleifschlamm zum Einsatz kommen – ideal für empfindliche oder stark strukturierte Oberflächen). Jede Methode eignet sich für unterschiedliche Materialien, Geometrien und angestrebte Oberflächenqualitäten.
Mechanisches Polieren: Die Grundlage für alles
Diese Methode wird man in professionellen Formenbauwerkstätten am häufigsten antreffen – und wenn sie von einem erfahrenen Techniker fachgerecht ausgeführt wird, lassen sich damit Oberflächen erzielen, die von einer standardmäßigen Mattierung bis hin zu einer optisch glatten, spiegelartigen Oberfläche reichen.
Bei diesem Verfahren wird Material schrittweise von der Formoberfläche abgetragen, wobei immer feineres Schleifmittel zum Einsatz kommt. Ein typischer Ablauf könnte wie folgt aussehen:
- Grobpolieren: Zum Entfernen von EDM-Brandspuren und Bearbeitungsspuren werden Ölsteine oder grobes Schleifpapier (Körnung 180–320) verwendet. Dies ist körperlich anstrengende Arbeit.
- Halbfertigbearbeitung: Schleifpapier mittlerer Körnung (Körnung 400–600) glättet die Oberfläche weiter und entfernt tiefere Kratzspuren aus dem vorherigen Arbeitsschritt.
- Feinschliff: Schleifpapier mit hoher Körnung (Körnung 800–1200), gefolgt von Diamantpaste, die auf Filzrollen oder Holzscheiben aufgetragen wird, verleiht der Oberfläche einen gleichmäßigen Glanz.
- Spiegelpolieren: In den letzten Bearbeitungsschritten kommen ultrafeine Diamantpasten (im Bereich von 0,5–1 Mikrometer) zum Einsatz, um Ra-Werte von bis zu Ra 0,008 μm zu erreichen – eine Qualität, die der von optischen Spiegeln entspricht.
Die eigentliche Herausforderung beim mechanischen Polieren besteht darin, dass dieser Vorgang in hohem Maße vom Können des Ausführenden abhängt. Ein erfahrener Formpolierer erkennt die Beschaffenheit des Stahls, passt Druck und Richtung intuitiv an und weiß, wann er zur nächsten Körnung übergehen muss. Ein weniger erfahrener Techniker kann scharfe Kanten abrunden, durch das Überspringen von Körnungen neue Kratzer verursachen oder unbeabsichtigt die Abmessungen des Teils verändern. Aus diesem Grund durchlaufen unsere Poliertechniker bei Dimud spezielle Schulungen – denn eine schlecht polierte Form, die ansonsten hervorragend bearbeitet wurde, ist wirklich schmerzhaft anzusehen.
Chemisches Polieren: Für komplexe Formen
Beim chemischen Polieren wird das Formteil in eine sorgfältig kontrollierte chemische Lösung getaucht, die vorrangig die mikroskopisch kleinen Erhebungen der Oberfläche – die „Gipfel“ – auflöst, während die „Täler“ relativ unberührt bleiben. Im Laufe der Zeit wird die Oberfläche dadurch deutlich glatter.
Sein eigentlicher Vorteil liegt in der Zugänglichkeit: Es dringt in schmale Rippen, tiefe Kerne und komplexe Strukturen vor, die mit mechanischen Werkzeugen einfach nicht erreichbar sind. Außerdem eignet es sich hervorragend für die gleichzeitige Bearbeitung mehrerer Bauteile im Chargenbetrieb.
Der Nachteil ist die Präzision der Steuerung. Die chemische Reaktion läuft so lange ab, wie das Bauteil eingetaucht ist, und eine zu lange Einwirkzeit kann feine Strukturen leicht abrunden. Die ordnungsgemäße Handhabung erfordert zudem entsprechende Sicherheitsvorkehrungen, da die verwendeten chemischen Medien in der Regel säurehaltig oder ätzend sind.
Elektropolieren: Gleichmäßig und konsistent
Beim Elektropolieren kommen die Prinzipien der Elektrolyse zum Tragen – das Formteil fungiert als Anode in einer Elektrolysezelle, und durch einen kontrollierten elektrischen Strom wird Material auf mikroskopischer Ebene von seiner Oberfläche abgetragen. Das Ergebnis ist eine außergewöhnlich gleichmäßige, glänzende Oberflächenbeschaffenheit.
Es wird insbesondere für Formteile aus Edelstahl in der Medizinprodukteherstellung und bei Anwendungen mit Lebensmittelkontakt geschätzt, bei denen sowohl Oberflächenglätte als auch Korrosionsbeständigkeit zwingende Anforderungen sind. Einer seiner herausragenden Vorteile ist, dass es tatsächlich verbessert die Korrosionsbeständigkeit des Stahls, indem die äußere, eisenreiche Oberflächenschicht entfernt und eine chromreiche Passivschicht zurückbleibt.
Ultraschallpolieren: Präzision auf engstem Raum
Beim Ultraschallpolieren kommt ein Werkzeug zum Einsatz, das mit Ultraschallfrequenzen – in der Regel 20–40 kHz – schwingt, während gleichzeitig eine Schleifpaste auf die Werkstückoberfläche aufgebracht wird. Die Energie der Schwingungen versetzt die Schleifpartikel in Bewegung, wodurch die Oberfläche sanft abgetragen und geglättet wird, ohne dass direkter mechanischer Druck durch ein Werkzeug ausgeübt wird.
Dadurch eignet es sich in einzigartiger Weise zum Polieren von Mikrostrukturen, tiefen Nuten und komplexen dreidimensionalen Oberflächen, bei denen herkömmliche Werkzeuge physikalisch Schwierigkeiten hätten, einen gleichmäßigen Kontakt aufrechtzuerhalten. Es findet zunehmend Verbreitung in Formenbaubetrieben, die an optischen Komponenten, medizinischen Bauteilen und Gehäusen für Präzisionselektronik arbeiten.
Wie läuft der Prozess der Formpolitur Schritt für Schritt ab?

Die Methodentypen zu verstehen, ist eine Sache. Zu wissen, wie ein professioneller Poliervorgang tatsächlich von Anfang bis Ende abläuft, hilft Ihnen jedoch dabei, Zeitpläne zu erstellen, Spezifikationen an Lieferanten weiterzugeben und Probleme zu erkennen, bevor sie zu kostspieligen Überraschungen werden.
Der Formpolierprozess folgt einer strukturierten Abfolge: (1) Oberflächenreinigung und -prüfung zur Erkennung von Bearbeitungsspuren und Defekten; (2) Grobpolieren zur Entfernung von EDM-Brandschichten und Werkzeugspuren mit Ölsteinen oder grobem Schleifmittel; (3) Feinstpolieren mit Schleifpapier mittlerer Körnung zur Beseitigung tieferer Kratzer; (4) Feinpolieren mit hochkörnigem Schleifpapier und Diamantpaste; (5) Endkontrolle anhand der festgelegten Oberflächenqualitätsnorm (z. B. SPI A-1 bis D-3). Jede Stufe muss abgeschlossen sein, bevor die nächste in Angriff genommen wird, und eine Verunreinigung zwischen den einzelnen Stufen muss strikt vermieden werden.
Den Ablauf darf man nicht überstürzen
Hier ist etwas, das man wissen sollte: Die größten Fehler beim Polieren von Formen passieren, wenn jemand eine Körnungsstufe überspringt, um Zeit zu sparen. Im ersten Moment erscheint das logisch – warum sollte man 20 Minuten mit Schleifpapier der Körnung 600 verbringen, wenn man direkt zur Körnung 1000 übergehen kann?
Das Problem ist, dass jede Körnung die Kratzspuren der vorherigen Körnung entfernt. Wenn man einen Schritt überspringt, kann das feinere Schleifmittel die tieferen Kratzer nicht vollständig entfernen, und diese Spuren werden deutlich sichtbar, sobald man die Spiegelpolierphase erreicht – oft sind sie erst unter schrägem Lichteinfall im Prüfraum erkennbar. Eine Nachbearbeitung an dieser Stelle ist weitaus zeitaufwändiger, als es gleich beim ersten Mal richtig zu machen.
Umwelt und Sauberkeit sind wichtiger, als man denkt
Beim hochpräzisen Polieren mit einem Zielwert von Ra 1 μm oder feiner wird die Umgebung zu einer entscheidenden Variable. Staub, Schwebeteilchen und sogar Hautfett von bloßen Händen können die Arbeitsfläche verunreinigen und neue Kratzer verursachen. Professionelle Polierraum für Arbeiten in Spiegelqualität sorgen für einen kontrollierten Luftstrom, und die Techniker verwenden häufig fusselfreie Handschuhe und spezielle Polierpads, die den Boden niemals berühren.
Prüfung in jeder Phase
Bei jedem Übergang zwischen den einzelnen Polierstufen sollte die Formoberfläche gründlich gereinigt (in der Regel mit einem mit Lösungsmittel getränkten, fusselfreien Tuch) und überprüft werden – idealerweise unter schrägem Licht, um verbleibende Kratzer oder Unebenheiten sichtbar zu machen. Wenn man trotz versteckter Mängel weitermacht, geraten die Polierzeitpläne schnell außer Kontrolle.
Bei Formen, die eine Oberflächenqualität nach SPI A-1 oder A-2 (die höchsten Präzisionsklassen) erfordern, kann allein die Polierzeit 15–25% der gesamten Vorlaufzeit für die Formenherstellung ausmachen. Das ist keine schnelle Arbeit. Doch für Kunden, die Gehäuse für Unterhaltungselektronik oder hochwertige Konsumgüter entwickeln, gibt es hier wirklich keine Abkürzung.
Was sind die SPI-Standards für die Oberflächenbeschaffenheit von Formen – und warum sind sie für Ihre Konstruktion von Bedeutung?
Wahrscheinlich ist Ihnen der Begriff “SPI-Finish” schon einmal irgendwo auf einer Formzeichnung oder einem Datenblatt begegnet, ohne dass klar erklärt wurde, was er eigentlich bedeutet. Hier finden Sie eine leicht verständliche Erklärung, die Ihre Gespräche mit Lieferanten wesentlich produktiver machen wird.
Die SPI-Normen (Society of Plastics Industry) für die Oberflächenbeschaffenheit von Formteilen definieren 12 Oberflächenqualitätsstufen in vier Kategorien: Klasse A (Spiegelglanz/Hochglanz: A-1, A-2, A-3), Klasse B (Seidenmatt: B-1, B-2, B-3), Klasse C (matt/Steinoptik: C-1, C-2, C-3) und Klasse D (strukturiert/perlgestrahlt: D-1, D-2, D-3). Die Angabe der richtigen SPI-Stufe in Ihrer Teilezeichnung ist von entscheidender Bedeutung – sie wirkt sich direkt auf die Kosten für die Formpolierung, die Vorlaufzeit, die Materialauswahl und die Ästhetik des Endteils aus. A-1 kostet deutlich mehr als C-3 und erfordert weitaus mehr Facharbeit und Zeit.
Die vier Klassen im Detail
Ergebnisse der Klasse A (A-1 bis A-3) werden durch Diamantpolieren erzielt. Sie ergeben die glattesten und reflektierendsten Oberflächen – im Falle von A-1 sind diese spiegelglatt. Diese Oberflächenqualitäten sind für transparente Teile (Lichtleiter, Linsen, klare Gehäuse) und optisch kritische Oberflächen unerlässlich. Auch die Wahl des Formstahls spielt eine Rolle: Um die Qualität A-1 zu erreichen, ist hochwertige Edelstähle wie S136 oder 420SS der sich wirklich spiegelglatt polieren und diesen Glanz behalten lässt. P20-Stahl lässt sich einfach nicht auf A-1-Qualität polieren – die innere Struktur des Stahls lässt dies nicht zu.
Platzierungen der Klasse B (B-1 bis B-3) Sie werden mit Schleifpapier bearbeitet und weisen eine feine, seidenmatte Optik ohne starken Glanz auf. Sie sind die Arbeitspferde der Konsumgüterfertigung – sie sehen gut aus, sind relativ einfach herzustellen und kostengünstig. Die meisten Gehäuse von Unterhaltungselektronikgeräten liegen hinsichtlich ihrer Oberflächenbeschaffenheit irgendwo im B-Bereich.
Platzierungen der Klasse C (C-1 bis C-3) Durch das Polieren mit Stein wird eine matte Oberfläche erzielt. Diese Oberflächen eignen sich ideal für nicht kosmetisch genutzte Flächen, tragende Innenwände und Teile, die nach dem Formpressen lackiert oder beschichtet werden sollen. Sie kommen außerdem dort zum Einsatz, wo eine leichte Oberflächenstruktur die Haftung bei Etikettierungs- oder Klebeanwendungen verbessert.
Platzierungen in der Klasse D (D-1 bis D-3) werden durch Trockenstrahlen mit Glasperlen oder Oxidstrahlmitteln erzielt, wodurch gleichmäßig strukturierte Oberflächen entstehen. Oberflächen der Güteklasse D werden häufig für griffige Oberflächen, technische Verkleidungen und alle Bereiche gewählt, in denen Blendschutz oder Fingerabdruckbeständigkeit erforderlich sind.
Die finanziellen Auswirkungen sind real
Eines sollte man schon früh im Produktentwicklungsprozess verstehen: Die Spezifikation von A-1 für eine Oberfläche, die lediglich B-2 erfordert, ist kein “auf Nummer sicher gehen”. Dies verursacht echte Mehrkosten – manchmal 20–40% allein für den Polieraufwand – und verlängert die Vorlaufzeit. Bei Dimud, während der DFM-Prüfungsphase (Design for Manufacturability), Wir besprechen regelmäßig die Anforderungen an die Oberflächenbeschaffenheit mit unseren Kunden, um sicherzustellen, dass jeder Oberflächenzone der Form die richtige Güteklasse zugewiesen wird, wobei wir ästhetische Anforderungen mit den Gegebenheiten hinsichtlich Budget und Zeitplan in Einklang bringen.
Welche Werkzeuge und Materialien werden beim Polieren von Formen verwendet?
Die Werkzeuge, die beim Polieren von Formen zum Einsatz kommen, sehen auf den ersten Blick recht einfach aus. Doch wie bei jedem Handwerk hängt die Qualität des Ergebnisses maßgeblich davon ab, dass man weiß, welches Werkzeug wann – und wie – eingesetzt werden muss.
Zu den wichtigsten Werkzeugen und Materialien für die Formpolierung gehören: Ölsteine (zur Grobbearbeitung der Oberfläche), Schleifpapier in abgestuften Körnungen (Körnung 180 bis 2000+), Diamantpolierpaste (in Körnungen von 6 Mikrometer bis hinunter zu 0,25 Mikrometer), Filzkugeln, Holzscheiben und Polierscheiben (zum Auftragen der Diamantpolierpaste), Ultraschallpoliermaschinen (für komplexe Geometrien), Rotationswerkzeuge mit aufgesetzten Schleifköpfen sowie Vergrößerungshilfen für die Qualitätsprüfung. Die Art des Formstahls und die angestrebte SPI-Oberflächenqualität bestimmen, welche Werkzeugkombination geeignet ist.
Diamant-Schleifpaste: Das wahre Arbeitstier bei feinen Körnungen
Für alle, die noch keine Erfahrung mit dem Polieren von Formen haben, verdient die Diamantpolierpaste besondere Beachtung. In den Phasen der Fein- und Spiegelpolitur sorgt die Diamantpolierpaste – die in der Regel auf einen Filzschwamm oder einen Holzpolierring aufgetragen wird – für den sanften Übergang von einer “schönen Oberfläche” zu einem “optischen Spiegel”.”
Diamantverbindungen werden nach ihrer Partikelgröße in Mikrometern klassifiziert. Eine übliche Abfolge könnte wie folgt aussehen: 6 μm → 3 μm → 1 μm → 0,5 μm → 0,25 μm, wobei in jeder Phase neue Polierwerkzeuge verwendet werden, um eine Kreuzkontamination zu vermeiden. Eine Kreuzkontamination zwischen den verschiedenen Körnungsstufen ist eine der häufigsten Ursachen dafür, dass Kratzer bei der Endkontrolle “wieder auftauchen”, lässt sich jedoch durch disziplinierte Arbeitsabläufe vollständig vermeiden.
Die Härte des Formstahls ist entscheidend
Hier ist ein praktischer Aspekt, der sich auf alle nachfolgenden Entscheidungen auswirkt: Härterer Stahl lässt sich schwieriger und zeitaufwendiger polieren, ermöglicht jedoch eine höhere und dauerhaftere Oberflächenqualität. Weichere Stähle wie P20 (typischerweise 30–36 HRC) lassen sich schneller polieren, erreichen jedoch keine A-1-Spiegelqualität. Gehärtete Edelstähle wie S136 (typischerweise 48–52 HRC nach der Wärmebehandlung) erfordern deutlich mehr Polierzeit, liefern jedoch eine außergewöhnliche Oberflächenqualität, die zudem gegen Korrosion durch aggressive Kunststoffadditive beständig ist.
Wenn Zusammenarbeit mit dem Formenbau-Team von Dimud, Die Wahl des Stahls und die gewünschte Oberflächenbeschaffenheit werden stets gemeinsam besprochen – denn die Wahl eines ungeeigneten Stahls für eine hochglanzpolierte Anwendung führt zu einem Problem, das sich in der Polierphase nicht mehr beheben lässt.
Was sind die häufigsten Fehler beim Polieren von Formen – und wie lassen sie sich vermeiden?

Nach jahrelanger Erfahrung im Präzisionsformbau lassen sich bei Polierfehlern ziemlich einheitliche Muster erkennen. Die meisten davon lassen sich durch die richtige Prozessdisziplin und eine gute Kommunikation zwischen Konstruktions- und Fertigungsteams vermeiden.
Die häufigsten Fehler beim Polieren von Formen sind: das Überspringen von Schleifstufen, um Zeit zu sparen (was zu versteckten Kratzern führt, die erst bei der Endkontrolle sichtbar werden), die Verunreinigung von Feinschleifstufen durch gröbere Partikel, das durchgängige Polieren in nur einer Richtung (was zu richtungsabhängigen Kratzmustern führt), das Überpolieren von Kanten und scharfen Konturen (wodurch kritische Geometrien abgerundet werden), die Festlegung einer falschen SPI-Oberflächenqualität für das Material sowie das Versäumnis, die Formoberfläche zwischen den Polierstufen gründlich zu reinigen. Die meisten dieser Fehler führen zu kostspieligen Nacharbeiten und verlängerten Durchlaufzeiten.
Richtungsabhängige Poliermuster
Ein subtiler, aber wichtiger Punkt: Die Polierrichtung spielt eine Rolle. Wenn man immer in derselben linearen Richtung poliert, können sich Richtungsstreifen bilden, die bei schrägem Lichteinfall sichtbar sind – selbst bei feinen Körnungen. Professionelle Polierer ändern die Richtung zwischen den einzelnen Körnungsstufen um 45–90 Grad, um sicherzustellen, dass vorherige Kratzspuren vollständig beseitigt und nicht nur durch parallele überdeckt werden.
Kommunikation zwischen Designer und Polierer
Ein häufiger Konfliktpunkt in der Lieferkette: Der Konstrukteur gibt in der Zeichnung eine SPI-Oberfläche vor, doch die erforderliche Oberflächenqualität lässt sich mit dem Formstahl, der bereits aus Preisgründen ausgewählt wurde, nicht erreichen. Niemand bemerkt diese Diskrepanz, bis das Werkzeug fertiggestellt ist und die Polierarbeiten beginnen.
Dies ist einer der Gründe, warum eine DFM-Prüfung in der frühen Phase wirklich wichtig ist. Bei Dimud prüft unser Ingenieurteam bereits in der Konstruktionsphase der Werkzeuge neben der Stahlauswahl auch die Spezifikationen zur Oberflächenbeschaffenheit, um genau solche Feststellungen in einer späten Phase zu vermeiden. Wenn Sie mit einem Lieferanten zusammenarbeiten, der erst nach der Bearbeitung der Form nach Ihren Anforderungen an die Oberflächenbeschaffenheit fragt – dann sollten Sie dem besondere Aufmerksamkeit schenken.
Wie wählen Sie den richtigen Poliergrad für Ihre Form aus?

Das ist die praktische Frage, die alles zusammenführt. Nicht jedes Produkt benötigt eine hochglanzpolierte Oberfläche. Tatsächlich kann übermäßiges Polieren bei bestimmten Anwendungen echte Probleme verursachen. Hier ist ein praktischer Leitfaden, der Ihnen hilft, die richtige Entscheidung zu treffen.
Bei der Wahl des richtigen Poliergrades für die Form müssen vier Faktoren gegeneinander abgewogen werden: (1) Funktionale Anforderungen – Muss das Bauteil transparent sein, eine geringe Reibung aufweisen oder dichtend wirken? (2) Ästhetische Anforderungen – Was sieht und berührt der Endverbraucher? (3) Materialverträglichkeit – manche Kunststoffe wie PP und PE können auf übermäßig glatten Oberflächen “Ausbreitungen” oder Fließspuren aufweisen; (4) Kosten und Vorlaufzeit – höhere Poliergrade erfordern längere Polierzeiten, hochwertigen Stahl und qualifizierteres Personal. Geben Sie die Oberflächenbeschaffenheit stets pro Oberflächenzone an, nicht pro Form – verschiedene Bereiche derselben Form erfordern oft unterschiedliche Poliergrade.
Die Oberfläche soll der Funktion entsprechen, nicht nur dem Aussehen
Transparente oder optische Teile erfordern die Oberflächenqualität A-1 oder A-2. Hier gibt es keinen Spielraum – es handelt sich um eine technische Anforderung, nicht um eine ästhetische Präferenz. Aber wie sieht es bei einem undurchsichtigen Gehäuse aus, das nach dem Formguss lackiert wird? Eine Oberflächenqualität B-3 oder sogar C-1 könnte tatsächlich besser, da eine etwas rauere Oberfläche für eine bessere mechanische Haftung der Lackschicht sorgt.
Ebenso kann bei Materialien mit hohem Fließvermögen wie Polypropylen eine extrem hochglänzende A-1-Formoberfläche zu Spritzspuren oder Fließspuren auf der Oberfläche des Fertigteils führen. Manchmal ergibt eine B-1- oder B-2-Oberfläche ein sauberer aussehendes Teil als die von Ihnen spezifizierte A-1-Oberfläche.
Frühzeitige Rücksprache mit Ihrem Formenlieferanten
Der beste Zeitpunkt, um die Oberflächenbeschaffenheit zu besprechen, ist während der ersten Überprüfung des Formentwurfs – nicht erst nach Abschluss der Bearbeitung. Bringen Sie bei diesem ersten Gespräch die funktionalen Anforderungen Ihres Produkts, die von Ihnen angestrebte SPI-Klasse für jede Oberfläche sowie Ihre Präferenzen hinsichtlich des Stahls ein. Wenn Sie einen Partner suchen, der diese frühzeitige technische Zusammenarbeit ernst nimmt, Die Fertigungsdienstleistungen von Dimud basieren genau auf einem solchen DFM-Prozess, bei dem der Schwerpunkt auf die Anfangsphase gelegt wird.
Und wenn Sie nicht sicher sind, wo Sie anfangen sollen? Wenden Sie sich direkt an uns – das Team von Dimud arbeitet in jeder Phase eng mit den Produktentwicklern zusammen, von der ersten Konzeptprüfung bis hin zu den serienreifen Werkzeugen.
Schlussfolgerung
Das Polieren von Formen ist keine glamouröse Arbeit. Man findet sie nicht auf den Titelseiten von Fachzeitschriften. Doch sie entscheidet im Stillen darüber, ob sich Ihr Produkt hochwertig oder billig anfühlt, ob Ihre Produktion reibungslos läuft oder Ihnen bei jedem Zyklus Schwierigkeiten bereitet und ob Ihre Form ein Jahrzehnt lang hält oder schon nach wenigen Monaten an Qualität verliert. Um es richtig zu machen, muss man die Methoden verstehen, für jede Oberfläche die richtige Oberflächengüte festlegen, den richtigen Formstahl auswählen und mit einem Fertigungspartner zusammenarbeiten, der das Polieren als ingenieurtechnische Disziplin betrachtet – und nicht als Nebensache. Die Diskussion über die Oberflächenbeschaffenheit beginnt bereits am Konstruktionspult. Stellen Sie sicher, dass dies auch bei Ihnen der Fall ist.
Haben Sie ein Produkt in der Entwicklung, für das Sie maßgeschneiderte Formenbau- und Oberflächengutachten benötigen? Nehmen Sie Kontakt mit dem Dimud-Team auf — Wir arbeiten mit Produktingenieuren in ganz Europa, Nordamerika und darüber hinaus zusammen, um Präzisionsanforderungen in serienreife Werkzeuge umzusetzen.