Als ich zum ersten Mal sah, wie jemand eine Silikonform von Grund auf herstellte, dachte ich, dass es fast zu einfach aussah. Gießen Sie etwas Gummi über eine Form. Warten. Fertig. Dann habe ich es selbst versucht. Sagen wir einfach, die Ergebnisse waren... lehrreich. Aber wenn man erst einmal den Prozess verstanden hat, ist es gar nicht so schwer, es richtig zu machen.
Der beste Weg, eine Silikonform herzustellen, besteht darin, den richtigen Silikontyp zu wählen (platin- oder zinnhärtend), das Urmodell gründlich vorzubereiten und zu versiegeln, das Silikon im richtigen Gewichtsverhältnis zu mischen, es langsam in einem dünnen Strahl zu gießen, um Lufteinschlüsse zu minimieren, und vor dem Entformen die volle Aushärtezeit abzuwarten. Für dreidimensionale Objekte ist eine zweiteilige Form erforderlich. Für Silikonkomponenten im Produktionsmaßstab ist das Flüssigsilikon-Spritzgießen (LSR) der professionelle Standard - es bietet Präzision, Wiederholbarkeit und Volumenkonsistenz, die handgegossene Formen einfach nicht erreichen können.
Die Schritte klingen einfach. Und das sind sie auch - wenn man weiß, was eigentlich schief läuft, warum es schief läuft und was eine Form, die 500 Abzüge übersteht, von einer unterscheidet, die bei der ersten Entformung reißt. Das ist es, was dieser Leitfaden behandelt, eine Frage nach der anderen.
Welche Materialien werden für die Herstellung von Silikonformen benötigt?
Bevor Sie einen einzigen Tropfen Silikon gießen, muss Ihre Materialliste sortiert werden. Wenn Sie diesen Schritt auslassen, müssen Sie mitten in der Aushärtungsphase improvisieren, was nie gut ausgeht. Im Folgenden erfahren Sie, was Sie tatsächlich brauchen und was die einzelnen Teile bewirken.
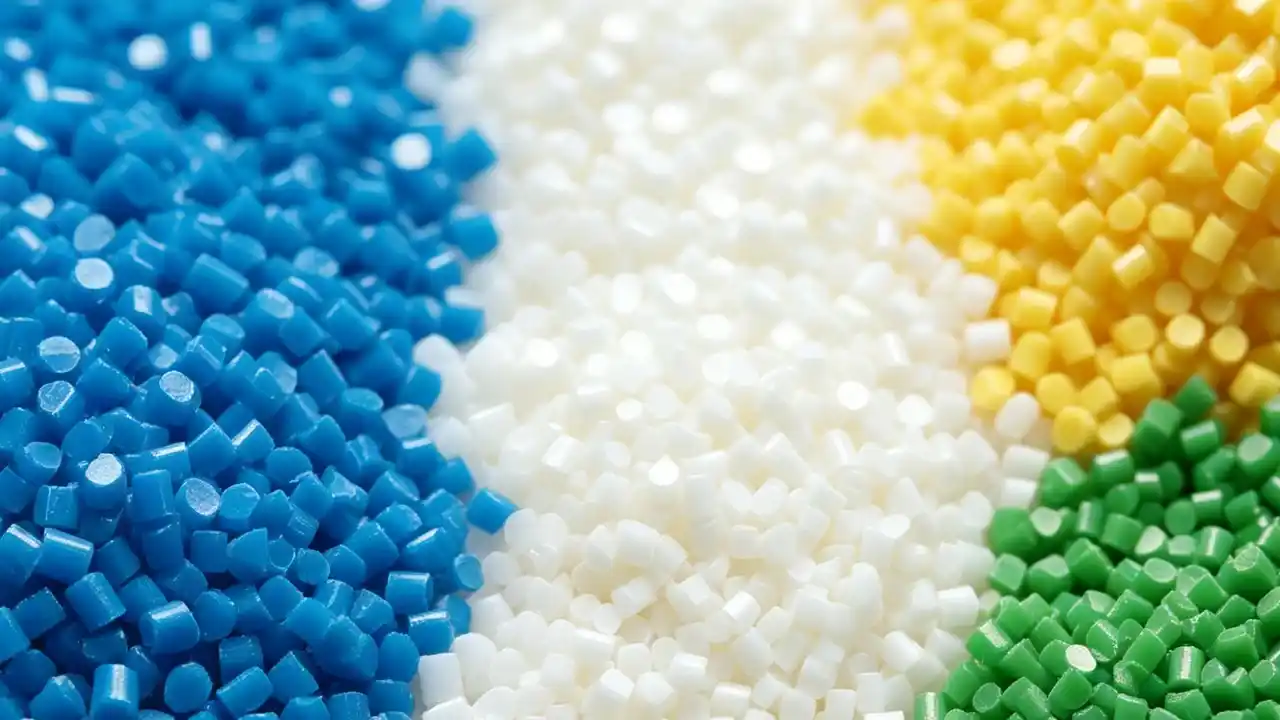
Für die Herstellung einer Silikonform benötigen Sie: flüssigen Silikonkautschuk (platingehärtet oder zinngehärtet), ein Urmodell, einen Formkasten oder einen Einschlussrahmen, ein Formtrennmittel, eine Digitalwaage, Mischbecher, Rührstäbchen und gegebenenfalls eine Vakuumkammer zum Entgasen. Bei zweiteiligen Formen ist zusätzlich Ton oder Schaumstoff für die Trennwand erforderlich. Jedes Element spielt eine direkte Rolle für die Qualität der Form - wenn Sie bei einem dieser Elemente sparen, wirkt sich dies auf das Endergebnis aus.
Der Silikongummi
Nicht jedes Silikon ist dasselbe Produkt. Sie haben die Wahl zwischen zwei verschiedenen chemischen Systemen:
- Platinhärtendes Silikon (additionsvernetzend): sauberere Chemie, längere Haltbarkeit, höhere Maßgenauigkeit, keine Schrumpfung von Nebenprodukten. Kompatibel mit den meisten Master-Materialien. Dies ist das, was Profis verwenden.
- Zinnhärtendes Silikon (kondensationshärtend): billiger im Anschaffungspreis, aber es setzt beim Aushärten eine kleine Menge Alkohol als Nebenprodukt frei, was zu einer leichten Schrumpfung führt. Außerdem ist es empfindlich gegenüber bestimmten Materialien (mehr dazu im Abschnitt "Fehler").
Wenn Sie Formen für das Gießen von Kunstharz, für Lebensmittel oder andere Präzisionsanwendungen herstellen, ist Platinhärtung die richtige Wahl. Immer.
Das Master-Modell
Das ist das Originalobjekt, das Sie kopieren - Ihr 3D-gedruckter Prototyp, eine handgefertigte Skulptur, ein maschinell bearbeitetes Teil, ein gefundenes Objekt. Das ist es, was die Leute übersehen: Silikon fängt alles ein. Jeder Fingerabdruck, jede Werkzeugspur, jede Pore in einer unversiegelten Oberfläche.
Behandeln Sie Ihr Urmodell ernsthaft. Schleifen Sie es, versiegeln Sie es, beenden Sie es nach dem Standard, den Sie für Ihre endgültigen Gussteile wünschen.
Der Formkasten
Sie brauchen einen Behälter, in dem das flüssige Silikon während des Aushärtens um Ihre Vorlage herum gehalten wird. Das kann ein mit Heißkleber versiegelter Karton, eine Schaumstoffform oder ein bearbeiteter Rahmen sein. Wählen Sie die Größe des Behälters sorgfältig aus - zu groß und Sie verschwenden teures Silikon, zu eng und Sie riskieren dünne Wände, die beim Entformen reißen.
Formentrennmittel
Silikon haftet nicht an den meisten Materialien - aber es tut klebt an anderem Silikon. Bei zweiteiligen Formen tragen Sie ein Trennmittel auf die erste Hälfte auf, bevor Sie die zweite Hälfte gießen. Vaseline, Pastenwachs oder ein handelsübliches Silikontrennspray eignen sich alle. Ohne Trennmittel wird Ihre zweiteilige Form zu einem festen Block, der sich nicht mehr trennen lässt.
Vakuumkammer (optional, aber lohnenswert)
Wenn Sie Silikon rühren, entstehen Luftblasen. Diese Luftblasen übertragen sich direkt auf die Oberfläche der Form und zeigen sich als winzige Vertiefungen in jedem Gussstück, das Sie herstellen. A Vakuumkammer entgast das gemischte Silikon vor dem Gießen, wodurch die Blasen herausgezogen werden. Für Hobbyarbeiten nicht unbedingt erforderlich. Grundsätzlich unerlässlich für alles, was eine saubere Oberfläche erfordert.
Als Referenz - auf industrieller Ebene, wenn Ingenieure die Spritzgießen von Flüssigsilikonkautschuk Bei Produktionsteilen werden Materialvorbereitung und Kontaminationskontrolle als zentrale Prozessparameter behandelt, nicht als nachträgliche Überlegungen. Die gleiche Denkweise, nur in größerem Maßstab.
Was ist das beste Material zur Herstellung von Silikonformen?
Diese Frage wird immer wieder gestellt, und die ehrliche Antwort lautet: Es kommt darauf an, was Sie herstellen und wie oft Sie die Form verwenden müssen. Aber ich werde Ihnen eine echte Antwort geben, anstatt Sie nur im Kreis zu schicken.
Das beste Material für die Herstellung von Silikonformen ist platinvernetzender (additionsvernetzender) Silikonkautschuk. Es bietet eine hervorragende Formbeständigkeit, minimale Schrumpfung, längere Lebensdauer der Form und eine breite Kompatibilität mit Ausgangsmaterialien. Beliebte Optionen sind die Serien Smooth-On Mold Star und Dragonskin. Für die industrielle Produktion, die Präzision, Hitzebeständigkeit und die Einhaltung von Vorschriften erfordert, ist Flüssigsilikonkautschuk (LSR), der im Spritzgussverfahren verarbeitet wird, der Standard. Zinnhärtendes Silikon ist eine kosteneffiziente Alternative, unterliegt jedoch größeren Einschränkungen in Bezug auf kompatible Master und Anwendungen.
Platinhärtendes Silikon: Die zuverlässige Wahl
Für die meisten Anwendungen im Formenbau - Gießen von Kunststoffen, Vervielfältigung von Prototypen, Silikonformen für Lebensmittel und kosmetische Produkte - ist platingehärtetes Silikon der beständige Gewinner. Hier ist der Grund, warum es dominiert:
- Keine Hemmung durch die meisten gängigen Master-Materialien - es härtet zuverlässig um Metall, ausgehärtetes Harz, die meisten Kunststoffe, Glas
- Vernachlässigbare Schrumpfung - was Sie formen, ist das, was Sie bekommen, maßlich
- Lange Lebensdauer der Form - eine gut gemachte Platinhärteform kann je nach Gussmaterial 50-200+ Ziehvorgänge überstehen
- Verschiedene Härtegrade verfügbar - Sie wählen, wie fest oder flexibel die ausgehärtete Form sein soll
Verständnis der Shore-A-Härte
Ufer A ist die Standardskala zur Messung der Weichheit oder Festigkeit von ausgehärtetem Silikon. Sie ist wichtiger, als die meisten Ratgeber zugeben:
- Shore 10A-20A - sehr weich und flexibel, hervorragend für Meister mit tiefen Hinterschneidungen, reißt aber leichter und verzieht sich bei schweren Gussstücken
- Shore 25A-35A - die ideale Lösung für den allgemeinen Formenbau, die Flexibilität und strukturelle Stabilität in Einklang bringt
- Shore 40A+ - fest und präzise, am besten für starre Gussmaterialien, aber schwieriger zu entformen bei komplexer Geometrie
Die Wahl der Härte auf der Grundlage der Geometrie Ihrer Vorlage - und nicht nur der Verfügbarkeit oder des Preises - ist eines der Details, die eine gute Form von einer frustrierenden unterscheiden.
Zinnhärtendes Silikon: Wo es zu kurz kommt
Zinnhärtendes Silikon ist billiger und eignet sich gut für einfache Anwendungen. Aber es hat echte Einschränkungen:
- Schrumpft leicht während der Aushärtung (problematisch bei Teilen mit engen Toleranzen)
- Inhibiert durch schwefelbasierte Tone - ein äußerst gängiges Ausgangsmaterial für Bildhauer und Modellbauer
- Enthält zinnorganische Verbindungen, die im Laufe der Zeit auslaugen können, weshalb es für Anwendungen mit Lebensmittelkontakt ungeeignet ist
- Kürzere Haltbarkeitsdauer
Für eine einfache Form mit geringem Aufwand, bei der die Kosten die einzige Einschränkung sind? Zinnhärtung funktioniert. Für alles, was Ihnen wichtig ist? Platinhärtung.
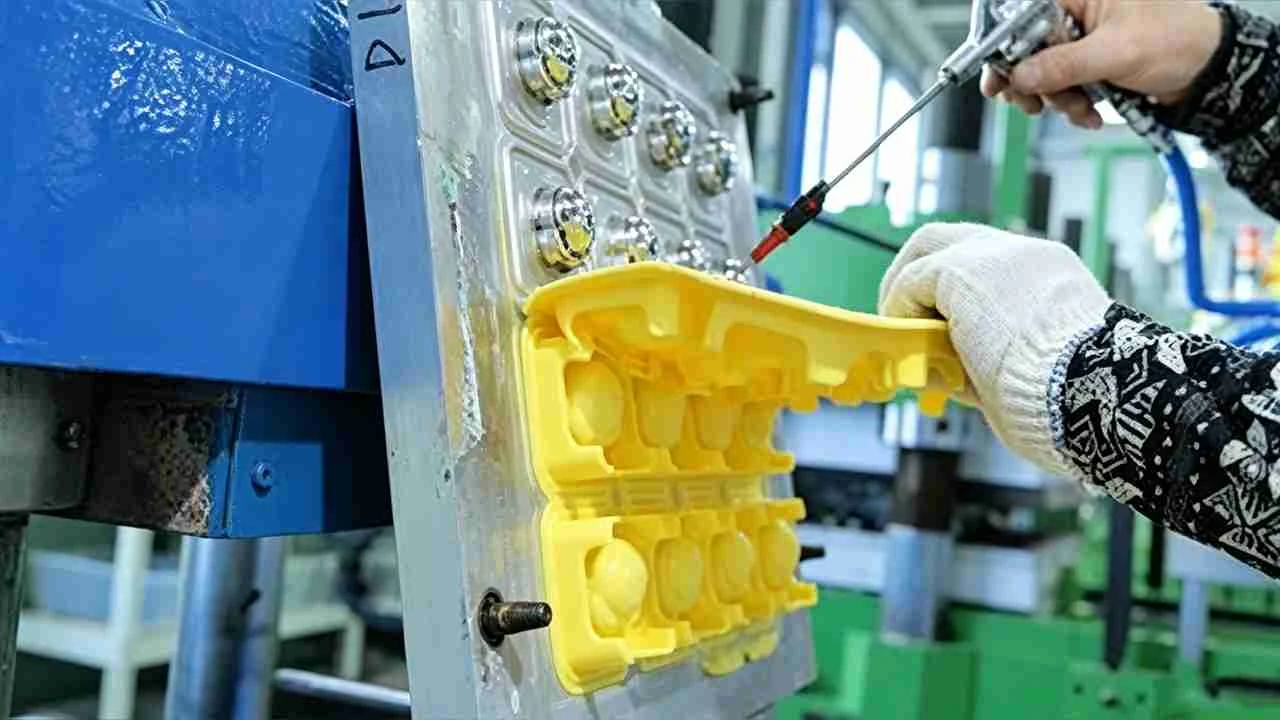
Industrietauglich: Flüssigsilikonkautschuk (LSR)
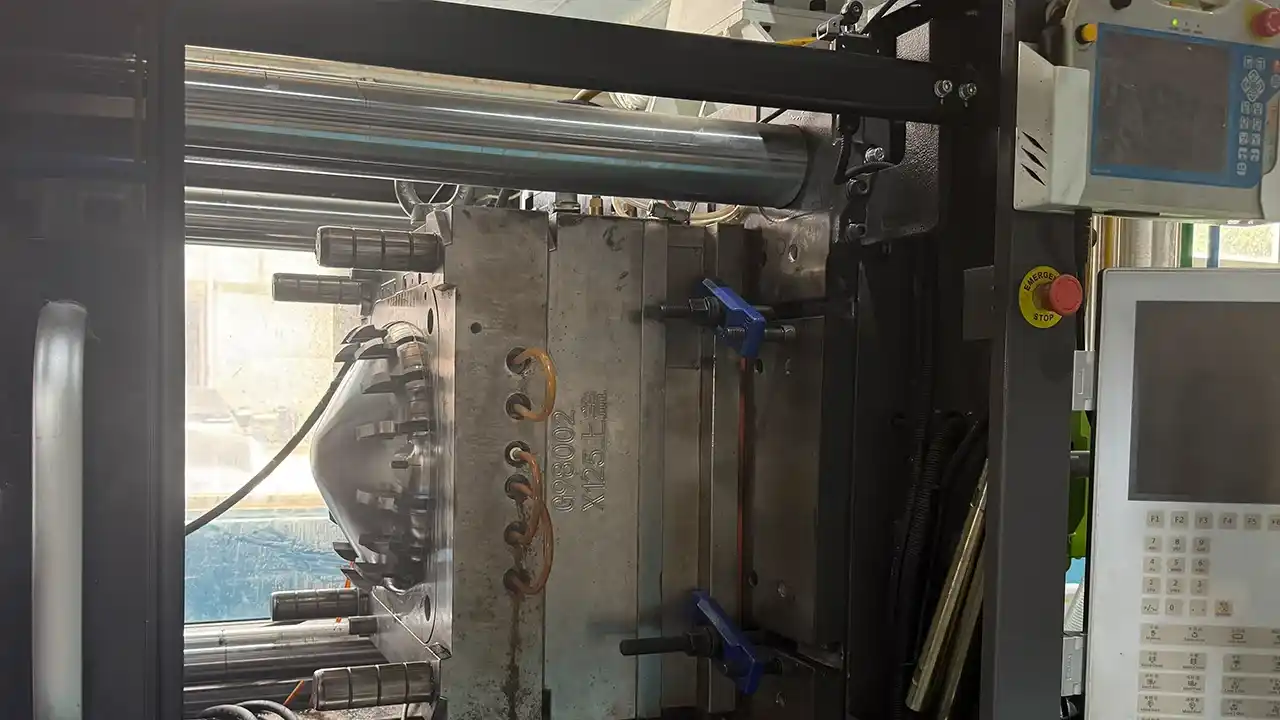
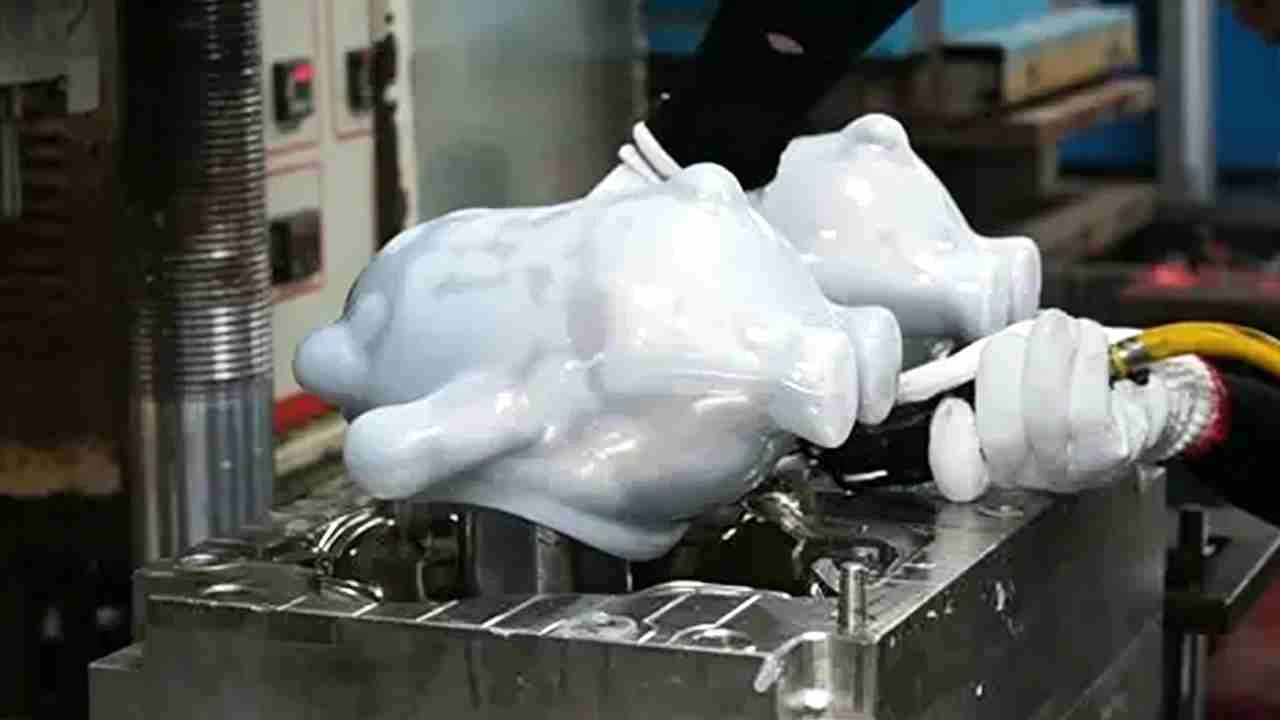
Dies ist eine ganz andere Kategorie. LSR ist ein zweikomponentiges, wärmegehärtetes Material, das durch Präzisionsspritzgussformenbau mit hochentwickelten Werkzeugen. Es werden Teile mit engen Maßtoleranzen, hervorragender Biokompatibilität und gleichbleibenden physikalischen Eigenschaften bei hohen Stückzahlen hergestellt.
Wenn Sie als Produktdesigner über Silikonkomponenten für ein skalierbares Produkt nachdenken - medizinische Geräte, Wearables, Automobildichtungen, Unterhaltungselektronik -, dann ist LSR-Spritzguss das richtige Verfahren für Sie. Die Anforderungen an die Werkzeuge sind erheblich, aber die Ergebnisse liegen in einer ganz anderen Leistungsklasse als alles, was Sie mit handgegossenen Silikonformen erreichen können.
Wie lange dauert es, bis die Silikonform aushärtet?

Geduld. Das ist die eigentliche Antwort. Aber lassen Sie mich konkreter werden, denn die Frage nach der Heilungszeit hat viele Variablen - und wenn man sich in der einen oder anderen Richtung irrt, kostet das etwas.
Die Aushärtungszeit von Silikonformen liegt in der Regel zwischen 4 und 24 Stunden bei Raumtemperatur (ca. 23 °C), abhängig von der Silikonformulierung und den Umgebungsbedingungen. Platinhärtende Silikone härten im Allgemeinen in 4-16 Stunden aus; zinnhärtende Systeme benötigen 16-24 Stunden oder länger. Wärme beschleunigt den Prozess - viele Formulierungen erreichen die vollständige Aushärtung in weniger als einer Stunde bei 65°C (150°F). Halten Sie sich immer an die vom Hersteller angegebene Aushärtezeit und vermeiden Sie eine vorzeitige Entformung, da eine teilweise Aushärtung zu Rissen und Oberflächenschäden führt.
Was die Aushärtungszeit tatsächlich steuert
Temperatur ist der wichtigste Faktor. Silikon härtet durch eine chemische Vernetzungsreaktion aus, und diese Reaktion wird durch Wärme beschleunigt. Das Verhältnis ist in etwa: Verdoppelung der Temperatur über der Umgebungstemperatur, etwa Halbierung der Aushärtungszeit (innerhalb der Grenzen). Aus diesem Grund härten Produktionsanlagen Teile oft in kontrollierten Öfen aus.
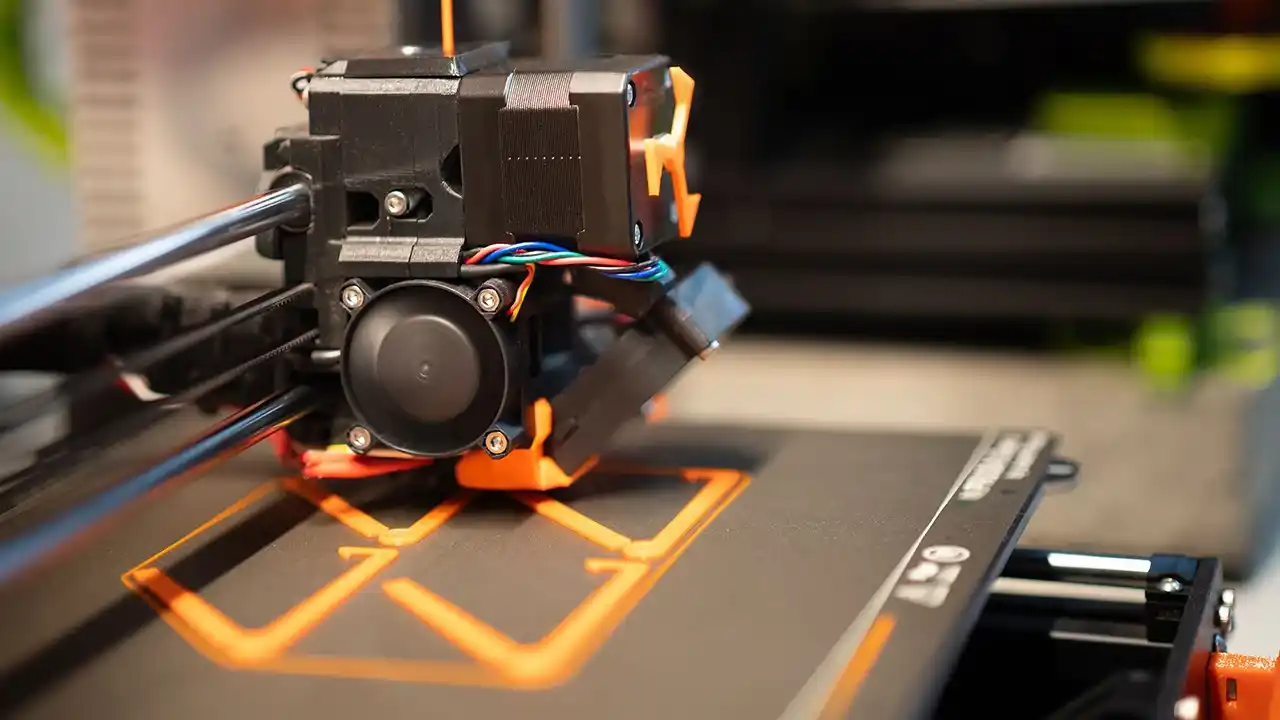
Der Haken: Ihr Urmodell muss diese Temperatur aushalten. 3D-gedruckte Harzteile, Wachsvorlagen, Schaumstoffformen - diese können sich bei 65 °C verziehen oder schmelzen. Kennen Sie die Temperaturtoleranz Ihrer Vorlage, bevor Sie zum Ofen greifen.
Mischungsverhältnis ist die zweitwichtigste Variable. Bei platinhärtenden Silikonen wird ein genaues Verhältnis verwendet - in der Regel 1:1 nach Gewicht, obwohl einige Produkte 10:1 oder andere Verhältnisse verwenden. Die beiden Komponenten haben unterschiedliche Dichten, so dass die Messung nach Volumen statt nach Gewicht das falsche Verhältnis ergibt. Ein falsches Verhältnis bedeutet unvollständige Aushärtung oder in manchen Fällen überhaupt keine Aushärtung. Klebriges, unbrauchbares Silikon ist das Ergebnis.
Verwenden Sie eine digitale Waage. Jedes Mal. Ohne Ausnahmen.
Luftfeuchtigkeit beeinträchtigt zinnhärtende Systeme. Kondensationshärtendes Silikon nutzt tatsächlich die Luftfeuchtigkeit als Teil der Reaktion - extrem trockene Bedingungen verlangsamen die Reaktion erheblich.
Woran Sie erkennen, ob Ihr Schimmelpilz wirklich bereit ist
Es reicht nicht aus, dass sich die Oberfläche fest anfühlt. Eine Form kann sich außen ausgehärtet anfühlen, während das Innere noch teilweise reaktiv ist - und beim Entformen zu diesem Zeitpunkt besteht die Gefahr, dass die dickeren Teile reißen.
Bessere Tests:
- Überprüfen Sie das restliche Silikon in Ihrem Mischbecher. Wenn es vollständig ausgehärtet ist, ist es wahrscheinlich auch Ihre Form.
- Drücken Sie Ihren Finger vorsichtig in einen dicken Abschnitt - wenn Sie einen Abdruck hinterlassen, warten Sie länger.
- Siehe das technische Datenblatt für Ihr spezifisches Silikon - es gibt die Aushärtungszeit an und Entformungszeit (die manchmal unterschiedlich sind)
Sichere Heilungsbeschleunigung
Die professionelle Standardmethode zur Verkürzung der Aushärtungszeit ist ein Niedrigtemperaturofen (60-70 °C). Einige Hersteller bieten auch Beschleunigungsadditive an, die die Reaktion bei Raumtemperatur beschleunigen - allerdings verkürzen diese in der Regel die Topfzeit, so dass Sie nach dem Mischen weniger Zeit zum Arbeiten haben.
In der Industrie Formenbau Verfahren ist Wärme eine präzise, kontrollierte Variable und keine Abkürzung. Dieselbe Disziplin gilt für jeden Maßstab: die Variablen kontrollieren, nicht raten.
Was sind häufige Fehler bei der Herstellung von Schimmelpilzen?
Die meisten Fehler in Silikonformen sind keine Unfälle. Sie sind vorhersehbar. Sie folgen Mustern. Und wenn Sie diese Muster kennen, können Sie sie fast vollständig vermeiden. Hier sind die, die ich am häufigsten sehe - und mache.
Die häufigsten Fehler bei der Herstellung von Silikonformen sind: nicht versiegeln von porösen Urmodellen (Silikon verbindet sich mit der Oberfläche), Verwendung falscher Mischungsverhältnisse (was zu einer teilweisen oder fehlgeschlagenen Aushärtung führt), Inhibierung durch inkompatible Urmaterialien (häufig bei schwefelhaltigen Tonen und bestimmten 3D-Druckharzen), Überspringen der Formtrennung bei zweiteiligen Formen (wodurch ein verschmolzener Block entsteht), zu schnelles Gießen (wodurch Luftblasen eingeschlossen werden) und Entformen vor der vollständigen Aushärtung (wodurch Risse und Verformungen entstehen). Jeder einzelne dieser Fehler ist vermeidbar.
Fehler 1: Ein nicht versiegeltes Mastermodell
Wenn Ihre Vorlage aus Gips, unbearbeitetem Holz, unversiegeltem Schaumstoff oder sogar aus einigen FDM-3D-Drucken besteht, hat sie mikroskopisch kleine Poren. Flüssiges Silikon fließt in diese Poren, verbindet sich chemisch mit der Oberfläche und zerstört die Vorlage entweder beim Entformen oder hinterlässt Teile der Vorlage in Ihrer Form.
Fix: Versiegeln Sie die Vorlage vor dem Gießen mit Lack, Schellack oder einem speziellen Versiegelungsmittel. Zwei dünne Anstriche, vollständig getrocknet. Immer.
Fehler 2: Messen nach Augenmaß statt nach Gewicht
Das ist der Fehler, den Anfänger machen und den auch erfahrene Leute begehen, wenn sie in Eile sind. Die beiden Silikonkomponenten sehen im Behälter ähnlich aus. Aber sie haben unterschiedliche Dichten, und eine volumenbasierte “ungefähr gleiche” Mischung wird chemisch nicht stimmen.
Verwenden Sie eine digitale Waage. Mischen Sie nach Gewicht. Stellen Sie die Schüssel auf die Waage, stellen Sie sie auf Null, fügen Sie Teil A hinzu, stellen Sie sie wieder auf Null, fügen Sie Teil B nach Vorgabe hinzu. Das dauert dreißig Sekunden länger und eliminiert eine der häufigsten Fehlerarten vollständig.
Fehler 3: Hemmungen - der Fehler, der alle überrascht
Platinhärtendes Silikon kann gehemmt - das heißt, sie härtet nicht aus, wenn sie mit bestimmten Materialien in Berührung kommt. Der betroffene Bereich bleibt auch dann noch klebrig oder flüssig, wenn der Rest der Form bereits fest ist. Klassische Inhibitionsquellen:
- Modellierung von Tonen auf Schwefelbasis (wie viele ölhaltige Tone) - dies ist sehr verbreitet
- Naturlatex und einige Gummimischungen
- Ungehärtete oder unsachgemäß nachgehärtete Harzdrucke
- Zinnhärtendes Silikon (ja, die Kontamination zwischen den Systemen verursacht dies)
- Einige Epoxidhärter und Polyesterharze
Bevor Sie eine ganze Charge Silikon auf ein neues Master-Material auftragen, machen Sie einen kleinen Kompatibilitätstest: Mischen Sie einen Esslöffel Silikon und drücken Sie ihn auf die Master-Oberfläche. Prüfen Sie es nach der vollen Aushärtungszeit. Wenn es dort klebrig ist, wo es die Vorlage berührt hat, müssen Sie ein Inhibitionsproblem lösen, bevor Sie weitermachen.
Fehler 4: Formentrennung bei zweiteiligen Werkzeugen vergessen
Silikon verbindet sich mit Silikon. Wenn Sie die zweite Hälfte einer zweiteiligen Form gießen, ohne die erste Hälfte zu entformen, erhalten Sie einen einzigen festen Block. Davon kann man sich nicht mehr erholen.
Tragen Sie eine dünne, gleichmäßige Schicht Vaseline, Pastenwachs oder ein handelsübliches Silikontrennspray auf alle Silikonflächen auf, bevor Sie die zweite Hälfte gießen. Gleichmäßig und gründlich - ein dicker Klecks an einer Stelle hinterlässt einen Abdruck auf der Oberfläche Ihrer Form.
Fehler 5: Zu schnelles Gießen
Ein dicker, schneller Guss schließt Luft ein. Diese Luftblasen treffen auf die Oberfläche der Vorlage und härten dort aus, wodurch Vertiefungen in der Form entstehen, die sich bei jedem Guss wiederholen. Die Lösung besteht darin, in einem dünnen, gleichmäßigen Strahl aus der Höhe zu gießen - lassen Sie das Silikon fließen und sich selbst ausgleichen. Noch besser: Entgasen Sie das angemischte Silikon vor dem Gießen unter Vakuum.
Fehler 6: Zu früh entformen
Ungeduld ist teuer. Eine Form, die bei 80% ausgehärtet ist, sieht fast gut aus - bis man die leichte Verformung, die leicht klebrige Oberfläche und den dünnen Abschnitt bemerkt, der gerissen ist. Eine unvollständige Aushärtung bedeutet eine geringere Reißfestigkeit. Halten Sie sich an die empfohlene Zeit. Nicht die Mindestzeit. Die empfohlene Zeit.
Dieses Prinzip des “Erkennens von Problemen, bevor sie auftreten” ist genau das, was DFM-Analyse (Design for Manufacturability) in der industriellen Formenentwicklung - das Äquivalent eines “inkompatiblen Master-Materials” oder eines “fehlenden Trennmittels” zu identifizieren, bevor ein Werkzeug überhaupt geschnitten wird.
Wie löst man eine Silikonform, ohne sie zu beschädigen?
Die Entformung ist der Moment, in dem alles entweder zusammenkommt oder auseinanderfällt. Eine gute Vorbereitung bedeutet, dass es fast schon antiklimaktisch ist - man biegt die Form vorsichtig, das Gussteil gleitet heraus, man ist fertig. Schlechte Vorbereitung bedeutet Risse, Verformungen oder Schäden an Teilen, die Sie in stundenlanger Arbeit hergestellt haben.
So lösen Sie eine Silikonform ohne Beschädigung: Tragen Sie vor dem Gießen ein geeignetes Formtrennmittel auf (für Nicht-Silikonoberflächen: Pastenwachs, Vaseline oder ein handelsübliches Trennspray). Beginnen Sie bei der Entformung eines Gussteils an den Rändern und arbeiten Sie sich nach innen vor, indem Sie die Form aus mehreren Winkeln biegen, anstatt nur in eine Richtung zu ziehen. Ziehen Sie bei Teilen mit Hinterschneidungen langsam ab und verwenden Sie bei Bedarf Seifenwasser an der Schnittstelle als Gleitmittel. Verwenden Sie niemals scharfe Werkzeuge, um die Trennung zu erzwingen.
Wann brauchen Sie eigentlich eine Entformung?
Silikon haftet von Natur aus nicht an den meisten Materialien - Glas, Metall, ausgehärtetem Harz und den meisten Kunststoffen. In diesen Fällen brauchen Sie oft überhaupt kein Trennmittel für den Gießschritt.
Wo Sie es brauchen:
- Silikon auf Silikon - immer. Zweiteilige Formhälften brauchen eine Trennschicht zwischen ihnen. Wenn Sie Silikon gießen in eine Silikonform, muss jeder Zug neu beschichtet werden.
- Poröse Oberflächen - Gips, unversiegeltes Holz, Schaumstoff. Verwenden Sie Trennmittel, um eine chemische Bindung an die Oberfläche zu verhindern.
- Sehr glatte, ebene Oberflächen - Manchmal entsteht auch auf nicht porösen Oberflächen eine Saugdichtung, die das Entformen erschwert.
Die richtige Entformungstechnik
Es gibt eine falsche Art des Entformens, bei der man in der Regel das Gussteil packt und gerade nach oben zieht. Auf diese Weise reißen dünne Teile und empfindliche Details werden beschädigt.
Der richtige Ansatz:
- Beginnen Sie an der Ecke oder an der am besten zugänglichen Kante. Stellen Sie zunächst eine kleine Trennstelle her.
- Biegen Sie den Formkörper. Biegen Sie es leicht, brechen Sie die Vakuumversiegelung auf und lassen Sie Luft hinein.
- Zurückschieben, nicht ziehen. Arbeiten Sie um den Umfang herum, bevor Sie versuchen, den gesamten Guss zu trennen.
- Für Hinterschneidungen: Weiches Silikon (unterer Shore A) hilft hier enorm - Sie können es um den Hinterschnitt herum dehnen, anstatt das Teil durchzudrücken. Nehmen Sie sich Zeit.
- Wenn es klemmt: Seifenlauge auf die sichtbare Oberfläche auftragen. Lassen Sie es einwirken. Versuchen Sie es dann erneut.
Schimmelpilzpflege für eine lange Lebensdauer der Schimmelpilze
Eine gute Silikonform hält nicht ewig, aber die richtige Pflege verlängert ihre Lebensdauer erheblich:
- Trennmittel erneut auftragen, wenn die Gussteile stärker als üblich zu kleben beginnen
- Überprüfen Sie die Form regelmäßig auf kleine Risse, insbesondere an dünnen Wänden, scharfen Ecken und Trennlinien.
- Lagern Sie die Formen flach oder so, dass das Silikon nicht dauerhaft belastet wird.
- Kleine Risse können manchmal mit frischem Silikon repariert werden - erkennen Sie sie frühzeitig, bevor sie sich ausbreiten.
Für Produktionsformen im industriellen Maßstab, bei denen die Langlebigkeit der Formen eine zentrale technische Anforderung ist, bietet unser Spritzgussformenbau Team legt die Lebensdauer der Form von Anfang an als Spezifikation fest und strebt je nach Anwendung 500.000 bis 1.000.000+ Zyklen an. Der Ansatz unterscheidet sich von handgegossenen Silikonformen, aber die zugrundeliegende Logik - Design für Freigabe, Design für Langlebigkeit - ist identisch.
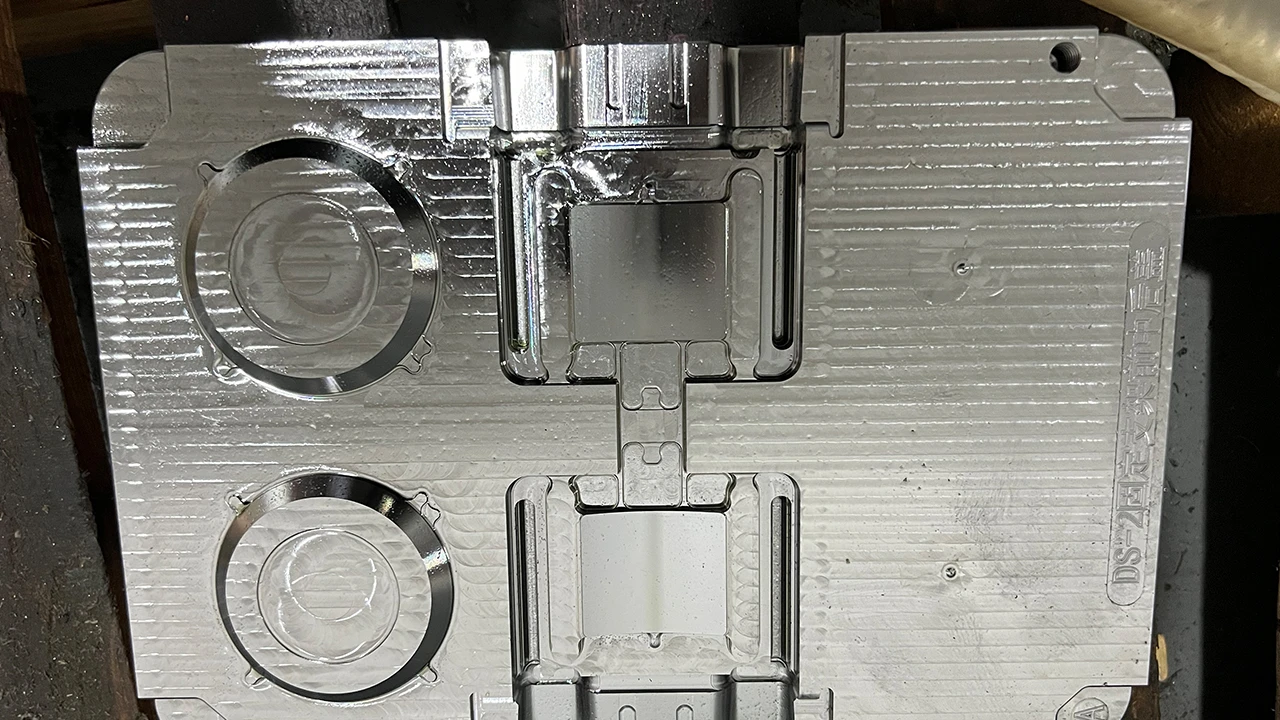
Was ist der Unterschied zwischen einteiligen und zweiteiligen Silikonformen?
Wenn Sie diese Frage stellen, werden Sie schnell herausfinden, wer tatsächlich etwas vom Silikonformenbau versteht und wer nur wiederholt, was er im Internet gelesen hat. Die Antwort bestimmt Ihren gesamten Prozess und welche Arten von Objekten Sie erfolgreich duplizieren können.
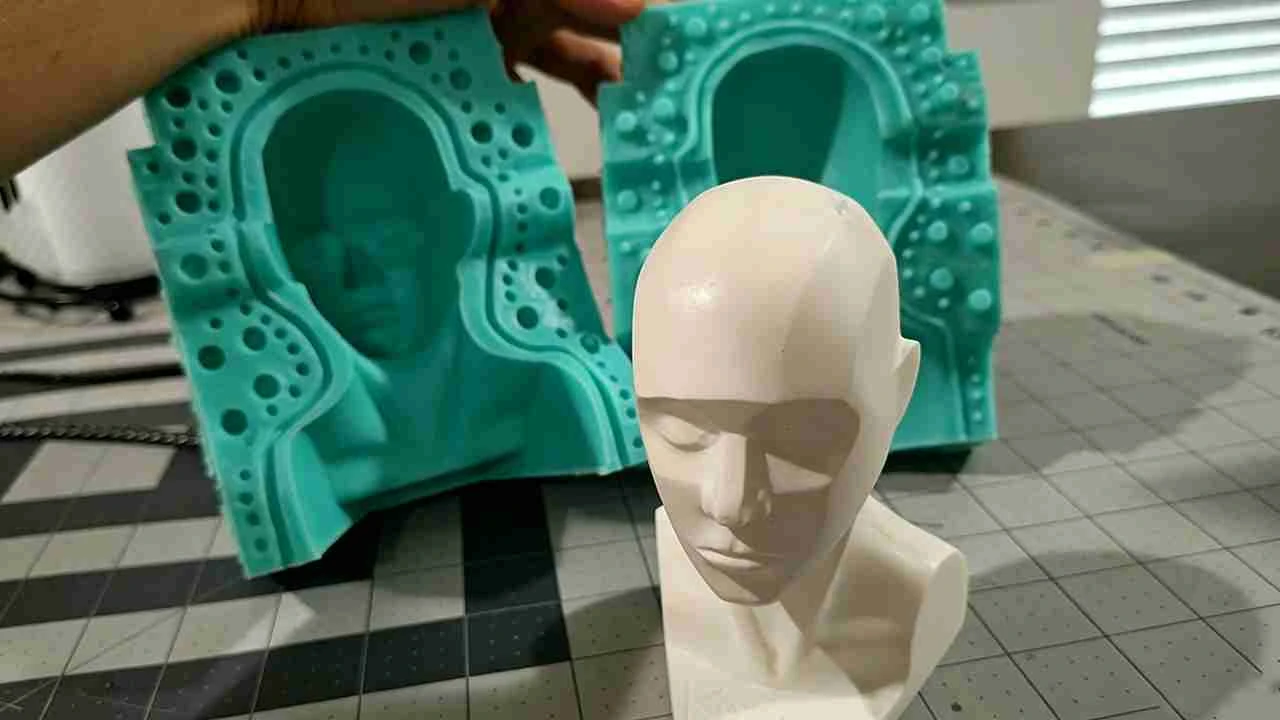
Eine einteilige Silikonform (auch Block- oder Handschuhform genannt) umschließt oder ummantelt eine Seite eines Objekts - sie eignet sich für flache Formen wie Fliesen, Plaketten oder einfache Reliefs. Eine zweiteilige (geteilte) Form umschließt das Objekt von zwei Seiten und ermöglicht es Ihnen, vollständig dreidimensionale Formen mit Hinterschneidungen zu gießen. Zweiteilige Formen sind aufwändiger in der Herstellung, werden aber für alle Objekte benötigt, die sich nicht sauber aus einem einseitigen Hohlraum ziehen lassen.
Einteilige Formen: Einfach, schnell und wirklich nützlich
Eine einteilige Form wird hergestellt, indem man die Vorlage in einen Kasten legt - mit der flachen Seite nach unten, falls vorhanden - und Silikon darüber gießt. Nach dem Aushärten haben Sie eine Form mit einer offenen Seite, in die Sie Ihr Gussmaterial gießen.
Dies funktioniert perfekt für:
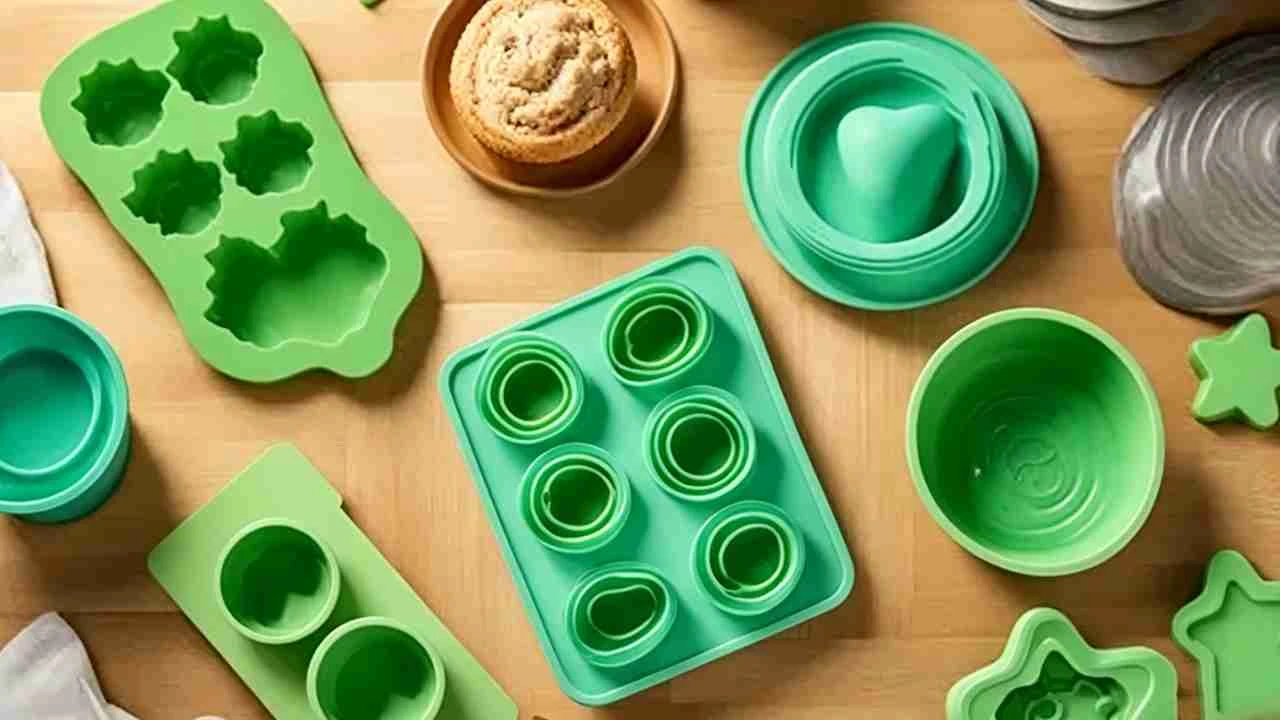
- Objekte mit flachem Rücken - Dekorative Fliesen, Münzen, Reliefteller, Silikonbackformen
- Flache Formen ohne Hinterschneidungen
- Schneller Durchlauf - weniger Aufbau, weniger Silikon, leichtere Entformung
Die Einschränkung ist einfach: Wenn Ihr Objekt vollständig dreidimensional ist - wenn es auf allen Seiten eine Geometrie hat oder wenn es in der Mitte breiter ist als oben - ergibt eine einteilige Form ein unvollständiges, flaches Gussteil. Nicht nützlich.
Zweiteilige Werkzeuge: Mehr Einrichtung, viel mehr Möglichkeiten
Eine zweiteilige Form unterteilt das Objekt entlang einer Trennungslinie - eine imaginäre Naht, die das Objekt in zwei Hälften trennt, von denen jede eine eigene Formhälfte erhält.
Der Prozess Schritt für Schritt:
- Die Vorlage bis zur Trennlinie in Ton einbetten - der Ton stellt dar, “wo die erste Hälfte endet”.”
- Bauen Sie einen Formkasten um die Baugruppe herum
- Gießen Sie die erste Formhälfte aus und lassen Sie sie vollständig aushärten.
- Entfernen Sie den Ton (die Vorlage bleibt an ihrem Platz und wird von der ersten Formhälfte festgehalten)
- Formtrennmittel auf alle Silikonoberflächen auftragen
- Gießen Sie die zweite Formhälfte
- Trennen Sie nach dem Aushärten die beiden Hälften und entfernen Sie den Master
- Fügen Sie die beiden Hälften zusammen, und Sie haben einen kompletten Hohlraum zum Gießen
Die Trennungslinie: Die Entscheidung, die am wichtigsten ist
Die Stelle, an der Sie die Trennlinie setzen, ist entscheidend:
- Trennebene auf der falschen Ebene? Das Gussteil wird in der Form eingeklemmt
- Eine Trennungslinie durch eine sichtbare Fläche? Sie sehen die Naht bei jedem Gussstück
- Die Trennlinie ist schlecht definiert? Ein Versatz zwischen den beiden Hälften führt zu Grat und Maßfehlern
Diese Entscheidung erfordert einen Blick auf die Geometrie des Objekts und die Überlegung, wie sich die Formhälften ohne Verriegelung trennen lassen. Es ist eines dieser Dinge, für die man fünf Minuten braucht, um sie zu verstehen, und ein paar misslungene Formen, um sie vollständig zu verinnerlichen.
Hinterschneidungen: Warum sie der wahre Grund sind, warum Sie zweiteilige Formen brauchen
Eine Unterschnitt ist jedes Merkmal, das breiter ist als die Öffnung, durch die es beim Entformen passen muss. Stellen Sie sich ein T-förmiges Profil vor - die Spitze des T ist breiter als der Schaft, so dass Sie es nicht gerade aus einer der beiden Hälften einer einseitig gerichteten Form herausziehen können.
Flexibles Silikon eignet sich gut für leichte Hinterschneidungen - man dehnt die Form um das Objekt herum und zieht sie ab. Starke Hinterschneidungen oder Objekte, die vollständig umschlossen sind (wie eine Kugel), erfordern jedoch beides:
- Eine zweiteilige Form mit sorgfältig gewählter Trennlinie
- Eine mehrteilige Form (drei oder mehr Abschnitte)
- Eine Handschuhformtechnik, bei der das Silikon in Schichten aufgetragen und wie ein Handschuh abgezogen wird
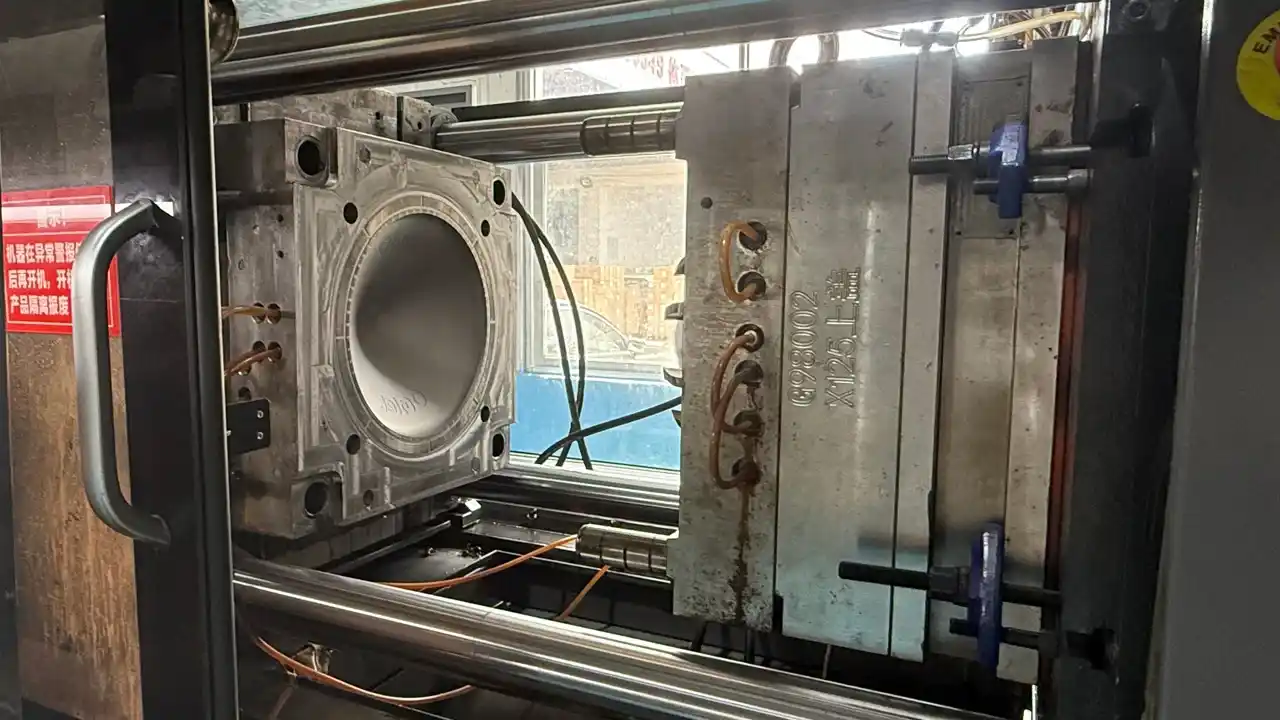
Wie sich dies auf den industriellen Formenbau auswirkt
Jede Spritzgießform ist im Wesentlichen ein zweiteiliges System - eine Kavitätenhälfte und eine Kernhälfte - mit einer vom Formenbauer definierten Trennlinie. Die Platzierung der Trennebene beeinflusst die Oberflächenqualität, die Anforderungen an den Entformungswinkel, die Position der Auswerferstifte und die Platzierung des Anschnitts.
Bei der Konstruktion von Industriewerkzeugen ist eine falsche Trennebene teuer. Es bedeutet, dass Stahl nachgeschnitten, der Formboden angepasst oder im schlimmsten Fall das Werkzeug ganz verschrottet werden muss. Das ist genau der Grund, warum die Konstruktion der Form und die DFM-Analyse vor Beginn der Bearbeitung durchgeführt werden - Entscheidungen über die Trennfuge werden in der Konstruktionsphase geprüft und genehmigt und nicht erst nach dem Bau des Werkzeugs entdeckt.
Ist Silikonform ungesund?
Diese Frage verdient eine direkte, ehrliche Antwort. Vor allem, da Silikonformen für Lebensmittel, Körperpflegeprodukte, Babyartikel und medizinische Geräte verwendet werden. Die kurze Antwort lautet: das hängt ganz von der Art des Silikons ab und davon, ob es vollständig ausgehärtet ist.
Vollständig ausgehärtetes platingehärtetes Silikon gilt als chemisch inert, ungiftig und biokompatibel - es wird in lebensmittelechten Backformen, medizinischen Implantaten und Babyprodukten verwendet. Bei ungehärtetem Silikon und zinnhärtenden Formulierungen ist mehr Vorsicht geboten: Bei der Zinnhärtung werden zinnorganische Verbindungen verwendet, die im Laufe der Zeit auslaugen können, insbesondere bei Hitze oder Säurekontakt, wodurch sie für die Verwendung in Lebensmitteln ungeeignet sind. Verwenden Sie für alle Anwendungen, die mit Lebensmitteln oder dem Körper in Berührung kommen, nur zertifiziertes, lebensmittelechtes platinvernetztes Silikon, und vergewissern Sie sich vor der Verwendung, dass es vollständig ausgehärtet ist.
Vollständig ausgehärtetes Platin-Silikon: Die sichere Option
Nach der Aushärtung hat platingehärtetes Silikon ein gut bekanntes Sicherheitsprofil:
- Chemisch inert - reagiert nicht mit den meisten Substanzen, mit denen es in Berührung kommt
- Ungiftig - unter normalen Bedingungen keine schädlichen Verbindungen freigesetzt werden
- Biokompatibel - in medizinischen Implantaten, chirurgischen Werkzeugen und neonatalen Geräten verwendet
- Thermisch stabil - hält Temperaturen von etwa -60°C bis +230°C aus, ohne sich zu zersetzen oder Verbindungen freizusetzen
Aus diesem Grund ist platingehärtetes Silikon das Material, aus dem lebensmittelechte Backformen, Sauger für Babyflaschen, Dichtungen für medizinische Geräte und eine breite Palette von Konsumgütern hergestellt werden, die eine gleichbleibende Sicherheit erfordern.
Zinnhärtendes Silikon: Wo Vorsicht geboten ist
Zinnhärtendes Silikon verwendet zinnorganische Verbindungen als Härtungskatalysator. Diese Verbindungen können unter bestimmten Bedingungen - insbesondere bei Kontakt mit säurehaltigen Lebensmitteln, Ölen oder erhöhten Temperaturen - aus dem ausgehärteten Material auslaugen. Aus diesem Grund:
- Zinnhärtendes Silikon sollte nicht für Formen mit Lebensmittelkontakt verwendet werden
- Es ist nicht für die Anwendung mit Hautkontakt über längere Zeiträume geeignet
- In der EU schließen die LFGB-Normen (Lebensmittel- und Futtermittelgesetzbuch) für Materialien, die mit Lebensmitteln in Berührung kommen, die meisten zinnhärtenden Formulierungen aus.
Für alles, was mit Lebensmitteln oder der Haut in Berührung kommt: nur mit Platin härten und sicherstellen, dass das Produkt ausdrücklich als lebensmittelecht eingestuft ist.
Ungehärtetes Silikon: Mit Vorsicht behandeln
Bevor Silikon aushärtet, sind die nicht umgesetzten Bestandteile chemisch aktiv. Längerer Hautkontakt mit unausgehärtetem Silikon kann zu Reizungen oder Sensibilisierung führen. Standard-Vorsichtsmaßnahmen:
- Tragen Sie beim Mischen und Gießen Nitrilhandschuhe
- Arbeiten in einem belüfteten Raum
- Vermeiden Sie jeglichen Kontakt mit Lebensmitteln oder Lebensmitteloberflächen, bis das Silikon vollständig und bestätigt ausgehärtet ist.
Schimmelpilze in Lebensmittelqualität vs. Industriequalität: Nicht das Gleiche
Eine aus lebensmittelechtem Platinsilikon hergestellte Form kann dennoch unsicher werden, wenn sie für andere Anwendungen als Lebensmittel verwendet wurde. Reste von Gussmaterialien - Epoxid, Polyurethanharz, Betonhärter - können die Oberfläche der Form verunreinigen. Verwenden Sie separate Formen für Lebensmittelanwendungen, und verwenden Sie sie nicht für andere Zwecke.
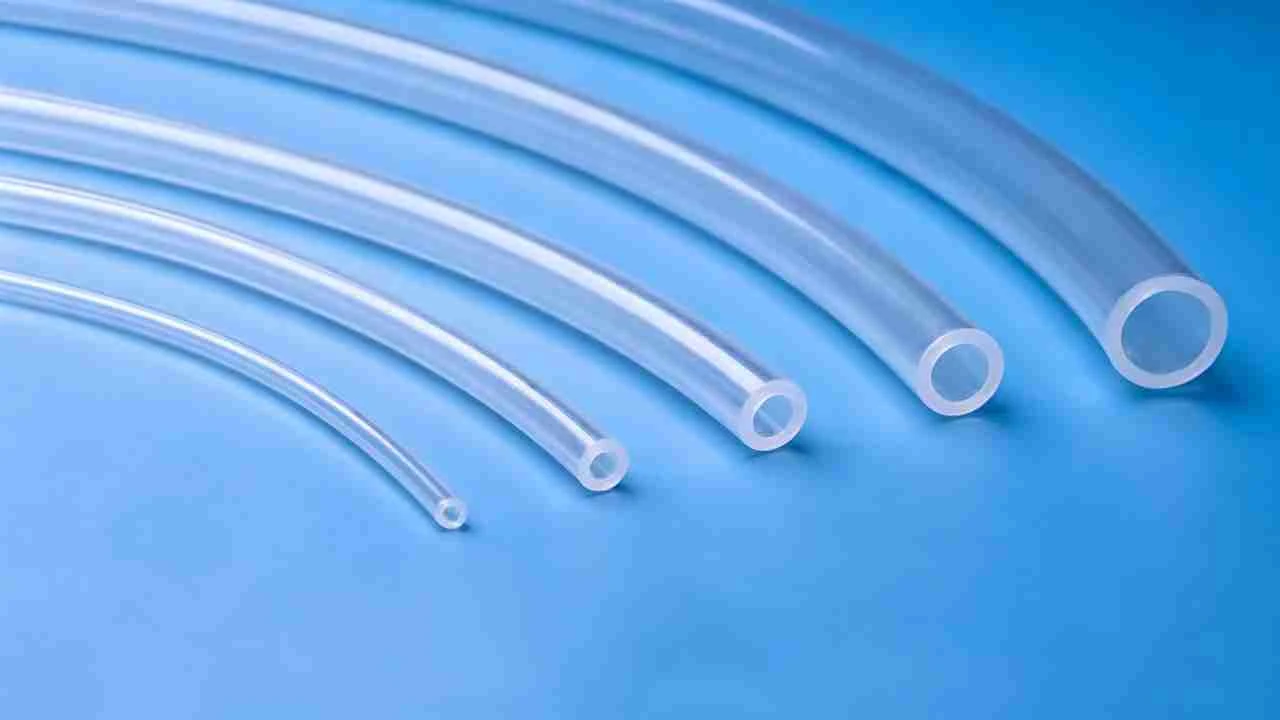
LSR in medizinischen und Konsumgüteranwendungen
Für Produkte, die eine zertifizierte Biokompatibilität erfordern - medizinische Geräte, Produkte für Kleinkinder, Wearables - ist das Spritzgießen von Flüssigsilikonkautschuk mit medizinischem oder lebensmittelechtem LSR der professionelle Standard. Diese Materialien werden getestet und zertifiziert, um Normen wie FDA-Konformität, ISO 10993 (Biokompatibilität für medizinische Geräte) und LFGB in Europa zu erfüllen.
Dabei geht es nicht nur um die Materialauswahl, sondern auch um kontrollierte Produktionsumgebungen, dokumentierte Rückverfolgbarkeit der Materialien und Qualitätssysteme, die sicherstellen, dass jede Charge die zertifizierte Spezifikation erfüllt. Dies ist ein grundlegend anderer Grad an Strenge als die Auswahl eines “lebensmittelechten” Etiketts auf einem Silikonbausatz für Verbraucher.
Wenn Sie ein Produkt in den Bereichen Medizin, Verbrauchergesundheit oder Lebensmittelkontakt entwickeln, das Silikonkomponenten enthält, ist die Materialzertifizierung keine Option. Sie ist die Grundlage, auf der der Rest des Produktsicherheitsnachweises aufgebaut ist. Wenn Sie bereits in der Entwurfsphase Expertenwissen zur Materialauswahl und DFM einholen, sparen Sie später viel Zeit und Kosten.
Schlussfolgerung
Bei der Herstellung einer guten Silikonform kommt es vor allem auf Vorbereitung, Präzision und Geduld an - drei Dinge, die leicht überstürzt werden können und teuer sind, wenn sie zu kurz kommen. Wählen Sie den richtigen Silikontyp für Ihre Anwendung, versiegeln und bereiten Sie Ihre Vorlage richtig vor, mischen Sie nach Gewicht, gießen Sie langsam und warten Sie auf die vollständige Aushärtung. Das ist 90%.
Wenn Ihr Projekt von der Werkbank in die reale Produktion übergeht - skalierbare Silikonbauteile mit engen Toleranzen und behördlichen Anforderungen - ist das ein ganz anderes Thema. Fühlen Sie sich frei zu mit dem Dimud-Team Kontakt aufnehmen. Wir helfen Ihnen gerne dabei, herauszufinden, was für die Entwicklung Ihres Produkts sinnvoll ist.