When a product fails in the field — a sealing gasket that cracks at -40°C, a medical device grip that deforms under repeated sterilisation, an automotive grommet that leaks after 50,000 km — the root cause is almost always a mismatch between material selection and moulding process. Rubber injection moulding solves problems that neither rigid plastics nor compression-formed rubber can handle alone, but only when you understand what it actually is, where it works, and where it doesn’t.
This guide is written for design engineers, product managers, and sourcing leads who are evaluating rubber injection moulding for a real project — not for readers who want a glossy overview.
What is Rubber Injection Molding?
Rubber injection moulding is a manufacturing process in which uncured rubber compound is heated, pressurised, and injected into a closed steel mould cavity, where it undergoes vulcanisation — a chemical crosslinking reaction triggered by heat — to produce a finished elastomeric part.
The key word is vulcanisation. This is what makes rubber injection fundamentally different from plastic injection moulding. In plastic moulding, the material melts under heat and solidifies when cooled. In rubber moulding, the opposite thermal logic applies: the material is heated to reduce viscosity for injection, then heated further inside the mould to cure. You’re not cooling a thermoplastic into shape — you’re chemically transforming an elastomer.
This distinction matters enormously for mould design, machine selection, and process control. A manufacturer that only runs thermoplastics cannot simply “switch” to rubber. The equipment, tooling geometry, and process parameters are fundamentally different.
That said, the term “rubber injection moulding” covers a wider family than most buyers realise:
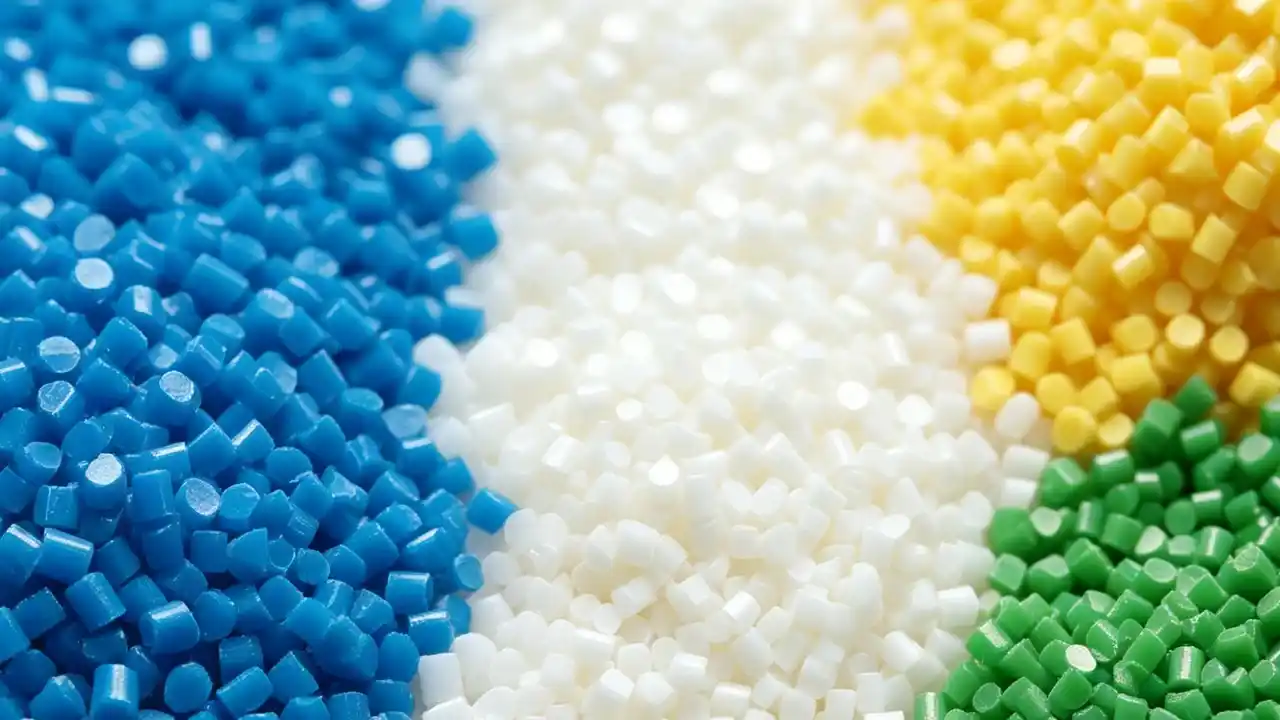
- Conventional vulcanised rubber (NBR, EPDM, NR, CR/Neoprene): true thermoset elastomers requiring cure cycles of 60–180 seconds at 160–200°C
- Liquid silicone rubber (LSR): a two-component platinum-catalysed system injected at room temperature into a heated mould; cure times of 15–60 seconds; the dominant choice for medical and food-contact applications
- Thermoplastic elastomers (TPE/TPR): materials that behave like rubber but process exactly like thermoplastics — they melt and solidify without chemical crosslinking, allowing standard injection moulding equipment and recyclable scrap
Understanding which category your application actually requires is the first decision that determines everything else.
The Rubber Moulding Process: Step by Step
The rubber moulding process for conventional vulcanised compounds follows this sequence:
1. Compound preparation. Raw rubber is mixed with vulcanising agents, accelerators, fillers, and plasticisers in a Banbury mixer or open mill. The compound’s Mooney viscosity is measured to confirm processability — typically ML(1+4) 100°C values between 30 and 80 for injection-grade compounds.
2. Strip or pellet feeding. Unlike plastic pellets, most rubber compounds are fed into the injection barrel as continuous strips approximately 30–35mm wide, or as pre-formed slugs. Strip feeding reduces air entrapment and ensures consistent shot weight.
3. Barrel heating and plasticisation. A screw or plunger system inside the heated barrel shears and warms the compound. The target barrel temperature is typically 70–100°C — warm enough to reduce viscosity for injection, but below the scorch temperature that would trigger premature vulcanisation. This range is narrower than most engineers expect, and maintaining it is non-negotiable.
4. Injection. The compound is injected through a heated sprue, runner system, and gate into the mould cavity under pressures of 100–200 MPa. Gate design is critical: too small a gate generates excessive shear heat and scorches the compound; too large a gate leaves a significant witness mark requiring post-mould trimming.
5. Vulcanisation (cure). The mould is held closed under pressure at 160–200°C for the specified cure time. Heat triggers crosslink formation throughout the part. Under-cure produces soft, sticky parts; over-cure causes brittleness and surface reversion in some compounds. Cure time is a function of part thickness, compound reactivity, and mould temperature — and must be validated experimentally, not assumed from a datasheet.
6. Demoulding and deflashing. Because rubber is elastic, ejection forces are lower than for rigid plastics, but mould release agents are commonly required. Flash — thin fins of excess rubber at the parting line — is inherent to rubber injection and is removed by cryogenic deflashing, tumbling, or manual trimming depending on part geometry and tolerance requirements.
Material Selection: NBR, EPDM, Neoprene, Silicone, and TPE

Choosing the wrong rubber compound wastes tooling investment faster than almost any other mistake. Here’s a practical breakdown of the materials used in injection rubber molding:
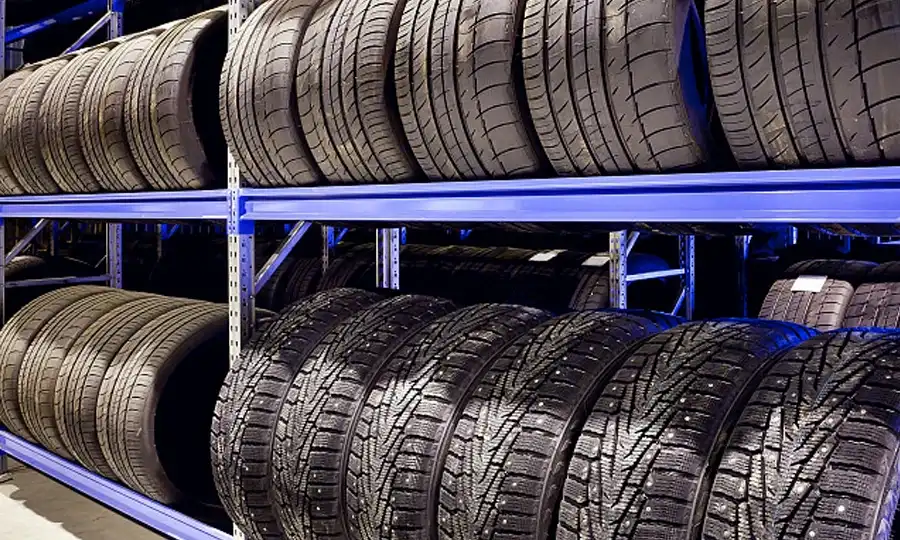
NBR (Nitrile Butadiene Rubber) — The default choice for oil and fuel resistance. Automotive hydraulic seals, fuel system components, and O-rings. Operating range approximately -40°C to +120°C. Poor ozone and UV resistance; not suitable for outdoor exposure.
EPDM (Ethylene Propylene Diene Monomer) — Excellent weathering, ozone, and UV resistance. Automotive door seals, window seals, HVAC gaskets. Good heat resistance to 150°C continuous. Poor petroleum oil resistance — do not use in fuel systems.
Neoprene (CR / Polychloroprene) injection molding — The historical workhorse for moderate oil, weather, and flame resistance simultaneously. Wire harness grommets, hose connectors, cable jackets. Less common in new designs as EPDM and NBR cover its key use cases more cost-effectively, but neoprene injection molding remains relevant where balanced resistance profiles are specified.
Silicone rubber injection molding process — The only compound that maintains flexibility from -60°C to +230°C continuously. Required for medical device components, infant products, food-contact seals, and high-temperature automotive sensors. The silicone rubber injection molding process differs depending on whether HTV (high-temperature vulcanising) or LSR is used. LSR dominates high-volume precision applications because it requires no pre-forming and achieves tighter dimensional tolerances. Silicone injection molding tips for LSR: maintain a cold-runner system at 10–20°C to prevent premature cure in the manifold; use static mixers to ensure homogeneous mixing of Part A and Part B immediately before injection.
TPE/TPR — For applications where rubber-like properties are needed but conventional cure chemistry isn’t required, thermoplastic elastomers are the practical alternative. They can be processed on standard plastic injection moulding machines, generate recyclable scrap, and require no cure time — cutting cycle times from 120+ seconds to 20–40 seconds. Shore hardness from 20A to 70D is achievable. The trade-off: heat resistance is limited to roughly 100–120°C continuous, and TPE cannot match the compression set performance of a fully vulcanised rubber compound in static sealing applications.
| Материал | Диапазон температур | Oil Resistance | Typical Application |
|---|---|---|---|
| NBR | -40 to +120°C | Превосходно | Hydraulic seals, O-rings |
| EPDM | -50 to +150°C | Бедный | Door/window seals, weatherstripping |
| CR (Neoprene) | -40 to +120°C | Умеренный | Grommets, cable jackets |
| Silicone (LSR/HTV) | -60 to +230°C | Умеренный | Medical, food-contact, sensors |
| TPE | -40 to +100°C | Varies by grade | Consumer electronics, ergonomic grips |
For a full overview of elastomeric and thermoplastic materials available for injection moulding production, see Dimud’s injection molding materials reference.
Automotive Rubber Injection Molding: What the Industry Actually Demands
Automotive rubber injection molding is the highest-stakes application of this technology. A door seal that shrinks 0.3mm more than specified causes wind noise complaints. A fuel system O-ring that fails releases hydrocarbons into the engine bay. These aren’t cosmetic defects.
The automotive sector’s specific requirements shape mould design and process control in ways that don’t apply to general industrial moulding:
Dimensional consistency across cavities. Multi-cavity injection rubber moulds for automotive seals must maintain part weight variation below ±0.5% across all cavities. This requires balanced runner systems with precisely machined gate dimensions — not adjusted empirically on the press floor.
Material traceability. IATF 16949-aligned production requires lot-level traceability of rubber compound. Suppliers must document compound source, Mooney viscosity measurement, and cure characteristics for every production run.
Flash control. Automotive assemblies increasingly use automated assembly robots. Flash on a grommet or seal that exceeds 0.3mm in height will jam a robotic insertion tool. This means the parting line location, vent design, and deflashing method must be specified at the mould design stage — not corrected after tooling is cut.
PPAP documentation. Production Part Approval Process (PPAP) submission for automotive rubber injection molded parts typically requires dimensional reports on 30 or more samples, material certifications, capability studies (Cpk ≥ 1.67 for critical dimensions), and MSA data for measuring equipment. Suppliers without in-house metrology capability cannot support this process.
For automotive buyers evaluating rubber injection molding services, the question isn’t just “can you mould this compound?” — it’s “what does your quality system look like at the process level?” Explore Dimud’s automotive injection molding capabilities for further detail.
Rubber Injection Moulding vs. Compression Moulding: Making the Right Call
Most buyers encounter both rubber moulding processes and need a clear decision framework. The answer depends on three variables: annual volume, part complexity, and flash tolerance.
Choose rubber injection moulding when:
- Annual volume exceeds 20,000 parts — the higher tooling investment amortises quickly against shorter cycle times (60–180 seconds vs. 3–10 minutes for compression)
- Part geometry includes thin walls, undercuts, or blind holes that compression tooling cannot form consistently
- Flash must be minimal — injection moulding’s closed-cavity process generates far less flash than open compression moulds
- Automation is required — injection rubber moulding machines can run lights-out; compression presses require manual loading
Choose compression moulding when:
- Volumes are below 5,000 parts annually and tooling cost is the primary concern (compression tools can cost 30–50% less)
- The part is thick-section, simple geometry, and cure time is already long — compression’s slower cycle is less of a disadvantage
- The compound is very stiff or high-durometer and doesn’t flow well under injection pressure
- Prototyping in the final compound is needed before committing to injection tooling
Transfer moulding sits between the two: the compound is loaded into a pot and transferred under pressure into a closed cavity. It offers better dimensional control than compression at lower tooling cost than full injection tooling, and is often used for insert-loaded parts where the rubber encapsulates a metal component.
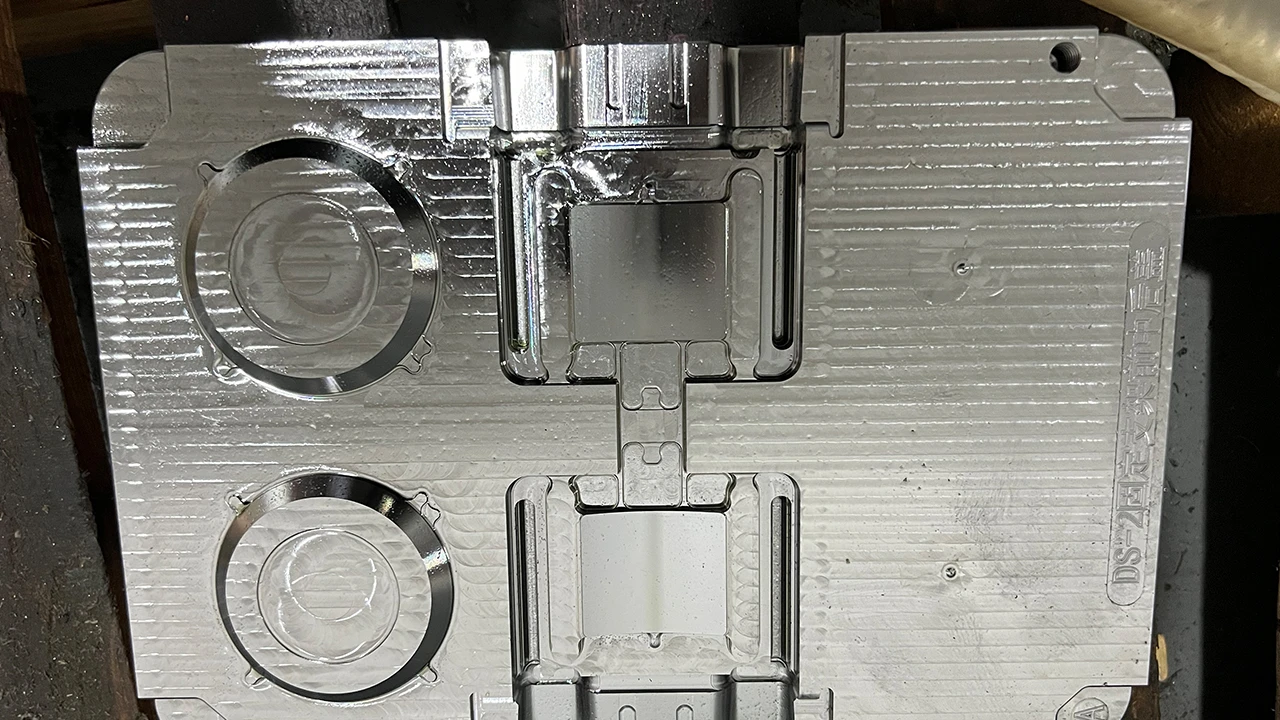
Injection Moulding Guidelines: Mould Design for Rubber
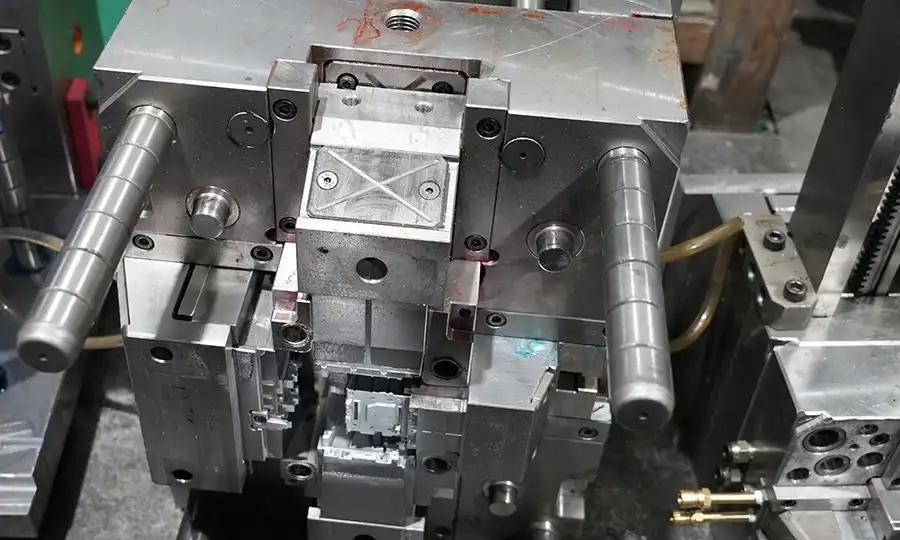
The following injection molding guidelines apply specifically to rubber and elastomeric materials. Engineers who design only thermoplastic tooling will encounter rubber-specific failures if they apply standard plastic design rules.
Wall thickness: Minimum 1.5mm for most vulcanised compounds; thinner sections risk incomplete cure and poor mechanical properties. Unlike plastic, rubber doesn’t have a strict maximum wall thickness — but sections above 15mm will have significant core-surface cure time differentials that must be accommodated in the cure cycle.
Draft angles: 3–5° minimum for interior walls; 5–8° for deep features. Rubber’s elasticity allows it to stretch off shallow drafts that would lock a rigid plastic part, but insufficient draft generates surface tearing on high-durometer compounds.
Вентиляция: Inadequate venting causes burn marks and short shots in rubber, as in plastic — but the cure chemistry makes venting more critical. Trapped air doesn’t just cause a cosmetic defect; it can inhibit vulcanisation at the void, leaving a soft uncured pocket inside an otherwise acceptable-looking part.
Gate location: Place gates at the thickest section and farthest from critical sealing faces. Weld lines in vulcanised rubber are genuine mechanical weakness points — the crosslink density at the weld is lower than in the bulk material.
Runner system temperature: For conventional rubber, runners are kept at barrel temperature (70–100°C). For LSR, a cold-runner system is mandatory to prevent premature cure in the manifold. This is the most common error in LSR tooling designed by shops without LSR-specific experience.
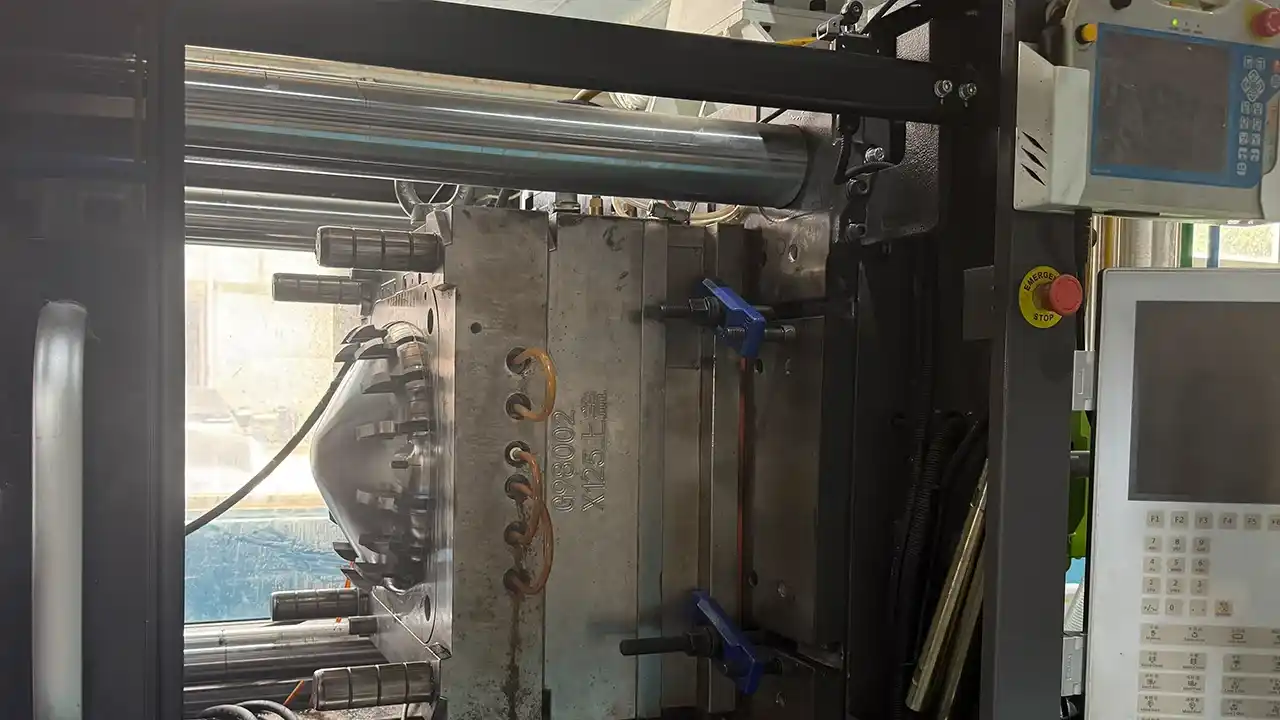
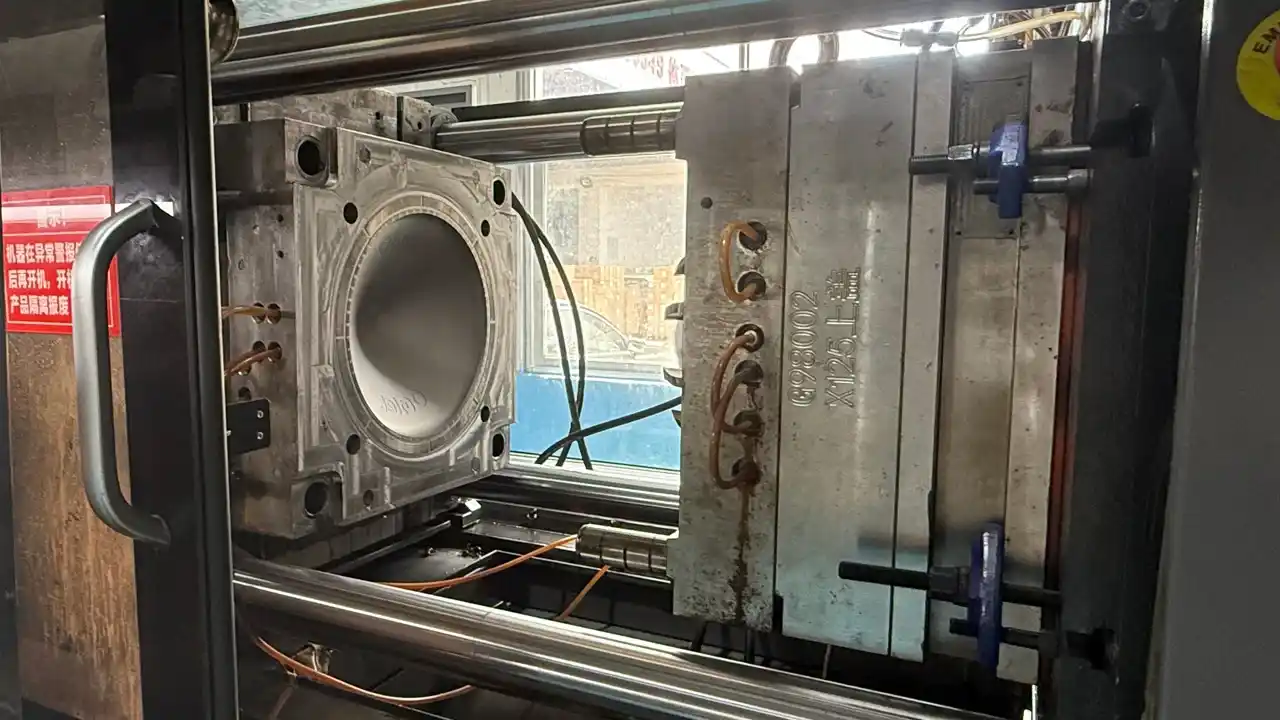
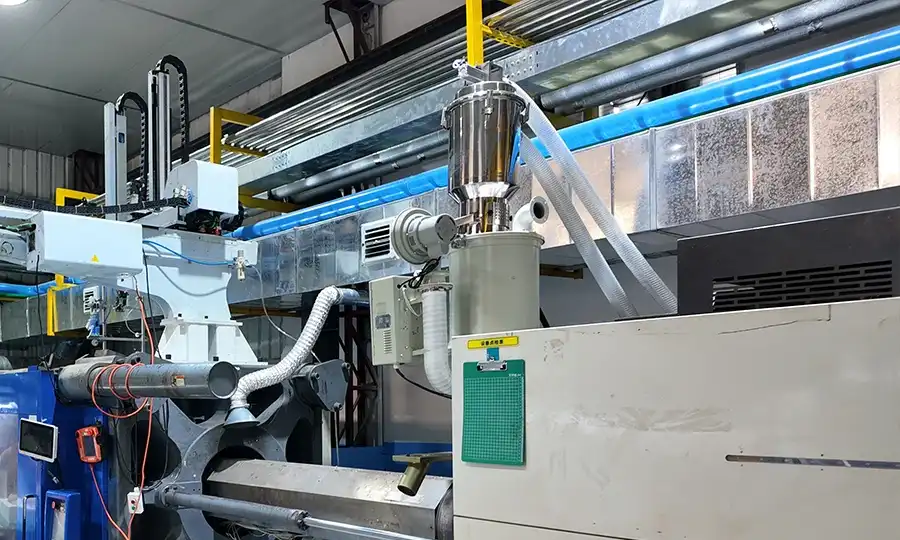
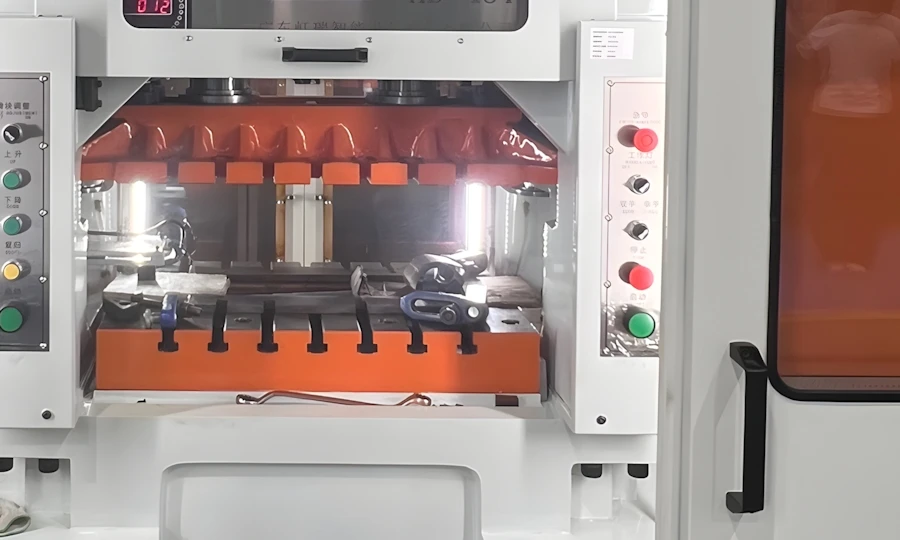
Injection Rubber Moulding Machines: What to Know Before Quoting
Injection rubber moulding machines differ from standard thermoplastic machines in several respects. Specifying the right machine type affects cycle time, flash levels, and achievable tolerances — which is why buyers should understand the basics when evaluating rubber injection molding services.
Screw geometry: Rubber screws have lower compression ratios (1.2:1 to 1.5:1 vs. 2:1–3:1 for plastic) to minimise shear heat and avoid premature vulcanisation. Using a standard plastic screw on rubber will scorch the compound.
Усилие зажима: Because rubber is injected at high viscosity and relatively low injection pressure (compared to engineering plastics), clamping force requirements are lower. A 200-tonne machine handles many rubber applications that would need 400 tonnes for an equivalent rigid plastic part.
Shot size: Rubber machines are calibrated by shot weight in grams of rubber compound, not shot volume in cm³. Compound density varies, so shot weight must be verified for each new compound.
LSR-specific machines: The silicone rubber injection molding process for LSR requires a dosing pump system that meters Part A and Part B at a 1:1 ratio, a static mixer, and a cold-runner injection unit. These are purpose-built additions; standard rubber injection moulding machines cannot run LSR without significant modification.
Rubber Molding Processes Capabilities: Where Each Method Fits
Understanding rubber molding processes capabilities across different production scenarios helps buyers make accurate tooling investment decisions before committing budget.
| Процесс | Стоимость оснастки | Время цикла | Flash Level | Ideal Volume |
|---|---|---|---|---|
| Rubber injection moulding | High ($5K–$30K+) | 60–180 sec | Низкий | 20,000+ parts/yr |
| Compression moulding | Low ($1K–$8K) | 3–10 min | Высокий | Under 5,000 parts/yr |
| Transfer moulding | Medium ($3K–$15K) | 2–5 min | Средний | 5,000–20,000 parts/yr |
| LSR injection | High ($8K–$40K+) | 15–60 sec | Очень низкий | 50,000+ parts/yr |
| TPE injection | Medium ($3K–$15K) | 20–40 sec | Низкий | 10,000+ parts/yr |
The table above is a planning tool, not a fixed rule. Part complexity, compound viscosity, and deflashing cost all affect where the crossover point falls for a specific project.
Rubber Plastic Molding: Opening New Design Space
Rubber plastic molding — producing a single component that integrates both rigid plastic structure and elastomeric function — is where injection moulding technology delivers outcomes no other process can match. The two main routes are overmoulding and insert moulding.
In overmoulding, a rigid plastic substrate is first moulded, then placed in a second mould tool where TPE or LSR is injected over it. The result is a single integrated component: a power tool grip bonded to a nylon core, a medical device housing with an integrated soft-touch seal, a waterproof electronic enclosure with moulded-in cable strain relief.
In insert moulding, metal or plastic inserts are loaded into the rubber mould before injection. The rubber encapsulates the insert during cure, forming a permanent mechanical and sometimes chemical bond. This is how automotive engine mounts are made — a steel housing encapsulated in NBR that provides both load-bearing structure and vibration isolation.
Both processes eliminate secondary bonding operations, adhesive application, and the quality risk of manual assembly. Dimud’s overmolding services и литье под давлением жидкой силиконовой резины capabilities are available as part of a fully integrated manufacturing workflow — from DFM analysis through to production tooling and quality-controlled mass production.
Common Defects in Injection Moulded Rubber Parts and Their Root Causes
Short shot (incomplete fill): Compound viscosity too high at injection temperature; injection pressure insufficient; gates undersized; excessive scorch causing compound to partially cure in the runner. Solution: raise barrel temperature 5–10°C, verify screw speed, widen gate.
Excessive flash: Mould clamping force insufficient relative to injection pressure; worn parting line; compound viscosity too low (over-heated barrel). Flash in rubber is more forgiving than in plastic — elasticity means parts can often be deflashed without dimensional damage — but controlling it at the tooling stage is always preferable.
Blistering or porosity: Trapped air from inadequate venting; moisture contamination in the compound; excessive barrel temperature generating volatiles. Compound should be stored sealed below 25°C; vent channels should be cleaned before every production run.
Under-cure (soft, tacky parts): Cure time too short; mould temperature below setpoint; inhibition of platinum catalyst in LSR from contact with sulphur-containing contamination (amine mould releases, latex gloves). In LSR processing, cure inhibition from contamination is a far more common failure mode than most buyers expect.
Shrinkage and dimensional deviation: Rubber shrinks significantly more than rigid plastic — typically 1.5–3% depending on compound and cure conditions. This must be designed into the mould dimensions from the start. Post-mould dimensional verification on first-article samples before production approval is not optional.
Working with Dimud: Integrated Manufacturing from DFM to Delivery

Димуд operates three manufacturing facilities covering mould engineering, CNC machining, and injection production. For customers with rubber or elastomeric component requirements, this means the DFM analysis, tooling design, and production run happen in a coordinated workflow — not handed off between separate vendors.
Our engineering team evaluates material selection (including whether LSR, TPE, or conventional rubber best fits your application), performs gate and runner analysis before tooling is cut, and delivers first-article inspection reports with full dimensional traceability. For engineers who have encountered quality or delivery failures with multi-supplier rubber moulding supply chains, consolidating into a single manufacturing partner with in-house tooling and process control changes the reliability picture significantly.
Explore Dimud’s full injection moulding services — or contact us directly with your part drawings and application requirements.
ЧАСТО ЗАДАВАЕМЫЕ ВОПРОСЫ
Yes. Rubber injection moulding has been in industrial production since the 1960s. Conventional vulcanised rubbers (NBR, EPDM, neoprene), liquid silicone rubber, and thermoplastic elastomers can all be injection moulded — but each requires different equipment and process parameters. Not every injection moulder can run all three; verify the specific capability before committing tooling.
In injection moulding, pre-heated compound is injected under pressure into a closed cavity — offering shorter cycle times, less flash, and better repeatability at high volumes. Compression moulding places a pre-weighed charge in an open mould and closes it under press force — simpler tooling, lower cost for low volumes, but slower and more flash-prone.
Typical cure times range from 60 to 180 seconds for conventional rubber compounds at 160–200°C mould temperature. LSR cure times are shorter — 15 to 60 seconds — due to the platinum-catalysed reaction mechanism. TPE has no cure step; cycle time is controlled by cooling, typically 20–40 seconds.
Flash results from compound flowing into the parting line gap before the mould clamps fully, from insufficient clamping force, or from a worn mould parting surface. Cryogenic deflashing is the standard post-process solution for precision parts.
Yes, neoprene injection molding is technically feasible. CR compounds can be processed on standard rubber injection machines. The main consideration is scorch sensitivity — CR accelerates faster than NBR or EPDM at elevated temperatures, requiring tighter barrel temperature control and shorter dwell times.
Tooling cost is the primary barrier for low volumes. A simple rubber injection mould typically costs $3,000–$15,000 USD depending on cavitation and complexity. For volumes below 5,000 parts, compression or transfer moulding often provides a better cost structure. Rapid aluminium tooling can reduce entry cost for evaluation quantities.
LSR requires purpose-built cold-runner injection units with integrated dosing pumps for Part A and Part B at a 1:1 ratio. Standard rubber injection moulding machines cannot run LSR without these modifications. When sourcing LSR parts, confirm the supplier has dedicated LSR equipment — not a converted conventional rubber press.
Final Thoughts
Rubber injection moulding is not a commodity process. The gap between a supplier who understands compound rheology, vulcanisation chemistry, and mould thermal management — and one who simply has a press and a heat source — shows up in dimensional consistency, flash rates, and first-article failure rates.
The materials are demanding. The process windows are narrow. The tooling requires rubber-specific engineering knowledge that doesn’t transfer directly from plastic mould design. For applications in automotive, medical, or industrial sealing where component failure has real consequences, that knowledge gap matters.
If you’re evaluating rubber injection molding services for an upcoming project, the right starting point is a DFM review with a manufacturer who has run the specific compound you’re considering. Contact Dimud’s engineering team with your part geometry and application requirements — and we’ll tell you exactly what we can and can’t do.